Spring ski touring in the Alps offers longer days, quieter slopes, and incredible routes. Whether you're a beginner or an expert, there's a route for you. Here's a quick look at the top 8 routes:
Haute Route (Chamonix to Zermatt): advanced, 7 days, glacier travel and steep terrain. Best from March to April.
Bernese Oberland Traverse: intermediate–advanced, 5–6 days, glacier systems and high peaks. Ideal from mid-March to early May.
Gran Paradiso Ski Tour: intermediate, 6 days, Italy's highest peak with moderate terrain. Best in April–early May.
Silvretta Traverse: beginner–intermediate, 5-6 days, gentle glaciers and hut comfort. March–April is ideal.
Ortler Circuit: intermediate, 5–6 days, dramatic peaks and varied terrain. Best from April to May.
Vanoise Traverse: intermediate, 4–5 days, moderate glacier skiing in a national park. March–April is best.
Ötztal Traverse: intermediate, 4–6 days, glacier skiing and high alpine huts. Ideal from March to May.
Aiguilles Rouges Traverse: intermediate–advanced, 1 day, technical couloirs and ridge climbing. Best mid-March to mid-April.
Quick Comparison Table:
| Route | Difficulty | Duration | Highlights | Best Months |
|---|---|---|---|---|
| Haute Route | Advanced | 6–7 days | Glacier travel, steep terrain | March–April |
| Bernese Oberland | Intermediate–Advanced | 5–6 days | High peaks, glacier systems | Mid-March–May |
| Gran Paradiso | Intermediate | 4–5 days | Italy’s highest peak | April–May |
| Silvretta Traverse | Beginner–Intermediate | 4–5 days | Gentle glaciers, hut comfort | March–April |
| Ortler Circuit | Intermediate | 5–6 days | Dramatic peaks, varied terrain | April–May |
| Vanoise Traverse | Intermediate | 4–5 days | National park, moderate glaciers | March–April |
| Ötztal Traverse | Intermediate | 4–6 days | Glacier skiing, high alpine huts | March–May |
| Aiguilles Rouges | Intermediate–Advanced | 1 day | Technical couloirs, ridge climbing | March–April |
Plan your trip carefully, monitor conditions, and, if needed, hire a certified guide for safety and expertise. Each route offers unique challenges and rewards, making spring an ideal time to explore the Alps.
Spring ski touring comes with its own set of challenges and rewards. Warmer temperatures and changing snow conditions can create both opportunities and risks, making careful planning essential.
Keeping an eye on temperatures is crucial for a safe and enjoyable spring tour. Ideally, overnight temperatures should dip below 30°F (-1°C) for at least 5–6 hours to ensure a solid freeze.
If the night remains warm and cloudy, it’s best to reconsider your plans. Spring weather is notoriously unpredictable, so staying updated with real-time forecasts is key. Once you’ve assessed the weather, understanding how the snowpack behaves throughout the day becomes your next priority.
Spring’s freeze–thaw cycle significantly impacts snow conditions. East-facing slopes soften earlier in the day, while north-facing slopes retain firmer snow for longer. Features like dark rocks can speed up melting, creating localized hazards. If the melt–freeze crust starts breaking down, it’s a good idea to shift to shadier terrain or call it a day.
Avalanche risks also evolve quickly during spring. Wet slab avalanches are a particular concern as water seeps into the snowpack. Warning signs like rollerballs or wet, loose avalanching can signal worsening conditions.
IFMGA guide Brenton Reagan sums up the challenges of longer tours:
You'd have to be a wizard to ski from the summit back to the car in perfect corn. At the end of the day it's probably going to be manky, so I need to choose terrain on my egress that's not going to avalanche on me.
Navigating these conditions requires the right gear and careful preparation.
Spring ski touring calls for gear that can handle rapidly changing conditions. Layering is critical - start with moisture-wicking base layers, add insulating mid-layers, and carry a waterproof shell for unexpected weather shifts. While you might aim to pack light, never compromise on safety essentials.
For technical challenges, ski and boot crampons are a must for navigating icy or firm snow. Ski crampons provide extra grip on hard-packed terrain, while skin wax helps prevent snow clumping during warmer parts of the day.
An avalanche safety kit remains non-negotiable. This includes a transceiver, shovel, and probe. Reliable options like the Mammut Barryvox 2 and 2S transceivers, the Ortovox Pro Light Shovel, and the Black Diamond Quickdraw Pro Probe 240 are worth considering.
Starting early is often the best way to make the most of firmer morning snow. However, avoid corniced ridges until the snow has refrozen, typically in the early morning or evening.
Practicing self-arrest techniques on gentler slopes can build confidence before tackling steeper terrain. Also, remember that wind can deposit snow much faster than natural snowfall, creating unstable conditions in a short time.
Plan your route with clear exit strategies and aim to time your ascents and descents when conditions are at their safest.
Spring touring adds layers of complexity to decision-making in the mountains. Certified guides from SummitGuides bring invaluable expertise to these challenging conditions. As AMGA- and IFMGA-certified guide Emilie Drinkwater explains:
A certified ski guide has the skills and knowledge to find powder stashes, manage rapidly changing snow and weather conditions and to take you off the beaten path. If you have a specific objective in mind, a guide can help you achieve that with as much risk minimization and efficiency as possible.
IFMGA certification involves rigorous training, ensuring guides are equipped to handle the unique demands of spring conditions.
Whether you’re new to spring ski touring or planning an ambitious alpine adventure, working with certified professionals can provide the local insights, weather expertise, and safety skills to make your trip both enjoyable and rewarding.
The Haute Route is a legendary ski touring adventure that connects Chamonix and Zermatt, stretching about 75 miles (120 km) through the heart of the Alps. This unforgettable journey takes skiers beneath some of Europe’s tallest peaks and concludes at the base of the iconic Matterhorn.
IFMGA guide Filippo Livorno sums up the allure of this route perfectly:
"The Haute Route (high road) is the quintessential 'must do' ski tour and appears frequently on bucket lists. For every ski tourer it is a milestone and a rite of passage, but how hard is the Haute Route, and am I ready to attempt it?"
The Haute Route is no casual endeavor - it’s considered an advanced ski tour. However, with proper preparation and solid fitness, even intermediate off-piste skiers with experience can give it a go. You’ll need to be comfortable linking parallel turns on challenging backcountry slopes, comparable to black diamond runs.
But skiing isn’t the only skill required. Thanks to receding glaciers, mountaineering techniques have become increasingly important. Knowing how to use ice axes and crampons, as well as being able to navigate steep snow slopes with ropes, is now a must.
The physical demands are significant, with roughly 19,700 feet (6,000 m) of total ascent and descent. Daily stages typically involve 3–5 hours of uphill skiing, with elevation gains ranging between 2,950 and 4,265 feet (900–1,300 m).
The Haute Route is as varied as it is challenging. It crosses glaciers, steep slopes, and exposed sections that require rope travel, crevasse rescue skills, and basic climbing techniques. From the Argentière basin to the Matterhorn’s approaches, the terrain keeps you on your toes.
Mountain huts along the way offer simple overnight accommodations, so being comfortable with shared spaces and early starts is helpful. With an average elevation of about 9,800 feet (3,000 m), you’ll also need to factor in high-altitude conditions and unpredictable weather. These elements, combined with the terrain, directly influence how long the tour takes.
Most guided groups complete the Haute Route in 6–7 days. SummitGuides, for example, offers a 7-day program starting at $2,110, which includes guide fees, hut stays, and group safety gear. It’s also smart to plan for an extra "weather day" to account for delays caused by less-than-ideal conditions.
Timing your trip is crucial, as weather and snow conditions can significantly impact your experience. The next section dives into the best spring months for tackling the route.
The prime time for the Haute Route is mid-March through late April. March tends to bring colder temperatures and powdery snow, but the shorter days require careful planning. By April, you’ll get longer daylight hours and warmer temperatures, which are great for spring snow. However, late April tours might encounter thinner snowpack, sometimes requiring short sections of walking.
Early in the season, skiers may face windslab risks, while the snowpack generally becomes more stable as spring progresses. Carefully timing your trip can make all the difference in ensuring a safer and more enjoyable experience.
The Haute Route is a demanding yet deeply rewarding journey, offering breathtaking scenery and a true sense of accomplishment. With the right preparation, fitness level, and perhaps the guidance of a professional, it’s a bucket-list adventure that lives up to its reputation as one of the Alps’ most celebrated ski tours.
The Bernese Oberland Traverse takes you through Switzerland's most glaciated region, offering jaw-dropping views of iconic peaks like the Eiger, Mönch, and Jungfrau. This route dives deep into high-altitude glacier systems, particularly in the area south of Jungfraujoch, which boasts the Alps' most extensive glaciation.
This traverse is not for beginners. It requires advanced ski touring skills, excellent physical fitness, and solid experience in glacier travel and crevasse rescue. You'll also need to be comfortable with exposed ridge climbing. Covering around 63 miles (102 km) and climbing approximately 23,700 feet (7,200 m), the route reaches a maximum elevation of about 9,114 feet (2,778 m). It’s a true test of endurance and technical ability.
The Bernese Oberland Traverse is a showcase of high-alpine adventure. Skiers will encounter expansive glaciers, remote passes, and sharp summits. The journey often starts at Jungfraujoch, with a descent on the Jungfraufirn glacier, followed by an ascent of Louwihorn. From there, a glaciated descent leads to the Konkordia Hut, accessed via secured ladders.
One of the highlights is the technical section near Finsteraarhorn, which involves exposed ridge climbs and challenging descents. The ascent of Finsteraarhorn (14,022 ft/4,274 m) itself is a demanding ridge climb. Another tricky segment is along the Fieschergletscher, where skiers must navigate the Fiescherlucke and descend from the Fieschersattel into the Ewig Schneefeld - a section that requires extra caution. The final descent into the Lötschental Valley provides a classic alpine ski run, capping off the adventure. Along the way, Swiss mountain huts offer simple yet reliable accommodations.
Most ski tourers complete the traverse in 4 to 7 days, depending on their goals and pace. Some seasoned adventurers extend their journey to include additional summits and explore more of the glacier systems. The route’s modular layout allows for flexible planning, making it adaptable to your group’s experience level and available time.
The ski touring season kicks off in March when the mountain huts open, and the extensive glacier coverage keeps conditions favorable through June. April and May are often the sweet spot for reliable conditions. March temperatures range from 34°F to 52°F, with snow cover at its peak during this time. Given the heavy glacier travel involved, it’s highly recommended to hire an experienced IFMGA guide to navigate crevasse hazards and optimize the route based on current conditions.
The Gran Paradiso Ski Tour offers a fantastic opportunity for those looking to combine high-altitude ski touring with a manageable climb. This route, which leads to the summit of Gran Paradiso - Italy's highest peak at 13,323 ft (4,061 m) - is an excellent introduction to ski mountaineering at higher elevations. Known for its accessibility among the Alps' 4,000-meter peaks, it’s a natural next step for skiers who have tackled classic routes like the Haute Route.
For skiers with intermediate to advanced skills seeking breathtaking descents paired with the thrill of a summit, Gran Paradiso is a perfect choice.
One of the highlights of this tour is the proximity it offers to the stunning mountain environment, along with the comfort of Italian mountain huts. Impressively, about 90% of the ascent is done on skis, with just a short and straightforward rocky scramble to reach the summit.
The Gran Paradiso Ski Tour is rated for intermediate to advanced adventurers. It requires solid ski touring expertise, strong physical fitness, and a willingness to take on varied terrain.
The route involves a climb of approximately 4,265 ft (1,300 m), which typically takes 7–8 hours. Expect wide-open slopes, some narrow passages, and inclines reaching up to 35°. The final 164 ft (50 m) to the summit demands basic mountaineering skills and equipment, and certain steep descents may require walking rather than skiing.
The route primarily traverses the Gran Paradiso glacier, where crampons and ropes might be necessary for the final approach. This is followed by a long, exhilarating ski descent.
Skiers will navigate glaciated landscapes, rugged mountain peaks, and remote valleys - ideal for those seeking quieter trails and an intimate connection with the alpine wilderness.
Many itineraries include a traverse of the Gran Paradiso massif, which not only enhances acclimatization but also builds essential skills for the summit attempt. The mix of technical challenges and sweeping descents makes this tour a standout among the Alps' springtime ski adventures.
A typical Gran Paradiso Ski Tour spans six days. This timeframe allows for proper acclimatization, skill development, and a triumphant summit day. The schedule usually includes arrival and preparation, progressive ski tours to build fitness and familiarity, and finally, the summit attempt followed by a celebratory descent.
The ideal time for this adventure is from mid-March to the end of April. March often delivers cooler temperatures and a higher chance of powder, though shorter days can limit skiing time. Late March to mid-April is considered the sweet spot, offering stable snow conditions and generally reliable weather. By late April, warmer temperatures usher in classic spring snow, though lower sections of the route may soften, requiring occasional walking.
"Towards the end of April you'll get more spring snow and warmer weather, but there’s a chance you’ll have to walk some of the lower sections of the route. The unknown is all part of the adventure though, right?"
Be prepared for significant temperature shifts, from freezing mornings to warm, sunny afternoons. Pack versatile skis that handle both powder and spring snow well, and bring layered clothing to stay comfortable in changing conditions.
The Silvretta Traverse offers an introduction to multi-day hut-to-hut ski touring in the Alps. Straddling the Austria-Switzerland border, this route features expansive, glacier-filled valleys and peaks that rise between 9,843 and 10,827 feet (3,000 to 3,300 meters). For skiers looking to step beyond single-day tours, the Silvretta provides an excellent starting point to build skills and confidence for future alpine adventures.
"This is a good 'first tour' in the Alps and, if your plans eventually include the Chamonix-Zermatt Haute Route, this is a great training choice."
The route is designed to help skiers develop a rhythm for touring and master the logistics of hut-to-hut travel. With steady ascents and descents, it offers a balanced challenge without the intense technical demands of more advanced routes. Reliable Austrian mountain huts along the way make it even more accessible, offering comfort and support so skiers can focus on the journey.
The Silvretta Traverse is ideal for intermediate skiers taking on their first multi-day hut-to-hut adventure. Participants need solid off-piste skiing skills and a good level of physical fitness. Daily climbs range from 1,969 to 3,281 feet (600 to 1,000 meters).
To prepare, it’s recommended to engage in endurance activities like running, cycling, or racket sports for at least eight weeks before embarking on the tour. While the descents are not overly steep, with angles under 30°, skiers should be comfortable navigating steeper terrain and executing smooth turns.
The terrain on the Silvretta Traverse is diverse, offering skiers the chance to tackle steady climbs and descents across glaciers, mountain passes, and summits. Some sections, such as the ascent of Piz Buin, involve glacier travel and navigating crevasses, providing valuable practice with roped glacier techniques.
The Austrian mountain huts along the route enhance the experience, offering hearty meals, hot showers, and a warm, social atmosphere. Some, like the Jamtal Hut, go above and beyond with amenities like private rooms, a climbing wall, or even an ice climbing tower. Most huts include half-board accommodations, making it easier to focus on skiing without worrying about meal prep.
Most itineraries for the Silvretta Traverse span five to six days, allowing time to acclimatize and progress gradually through the varied terrain. This balance of adventure and accessibility makes it a manageable yet rewarding tour for those new to multi-day alpine skiing.
Spring is the prime season for skiing the Silvretta Traverse, with the best conditions typically found from early March to mid-April. Custom trips can also be arranged from mid-February through the end of April. During this period, temperatures can range widely - from as low as 14°F (-10°C) at night to as high as 59°F (15°C) during the day. Such shifts call for versatile layering systems and consistent hydration, which are essential for staying comfortable and acclimated to the altitude.
The Ortler Circuit is a spring ski tour in the Alps that combines challenging terrain with the charm of Italian hospitality. Nestled in the Cevedale-Ortler region, between St. Moritz in Switzerland and the Italian Dolomites, this circular route winds through Stelvio National Park. The park boasts 14 peaks over 3,000 meters, including the towering 3,905-meter Ortler. This adventure not only tests your skiing abilities but also immerses you in the beauty and culture of the Italian mountains.
Starting just above Santa Caterina di Valfurva, the route forms a complete loop through the mountains, bringing skiers back to their starting point after nearly a week. Along the way, you'll conquer iconic peaks such as Monte Cevedale (3,774 meters), Pizzo Tresero (3,595 meters), and Punta San Matteo (3,678 meters). The combination of varied summits and the circular route makes for a thrilling and rewarding spring skiing experience.
Italian mountain huts, or refugios, elevate this journey with their unique blend of comfort and cuisine. Picture yourself enjoying four-course meals, hot showers, and even gelato after a day on the slopes. Unlike the simple accommodations often found in other parts of the Alps, these huts create an experience where alpine adventure meets Italian indulgence.
The Ortler Circuit is on par with the classic Haute Route in terms of difficulty, making it best suited for advanced skiers with solid touring experience. Expect to navigate black runs and handle steep terrain using techniques like hop turns and stem christies.
With daily vertical gains averaging around 4,000 feet (1,200 meters), excellent physical fitness is a must. You'll also need to be proficient with skins, kick turns, and pack touring, as well as managing speed on variable snow and navigating glaciated terrain.
The tour is adaptable, allowing daily objectives to shift based on conditions and group ability. However, it’s ideal for intermediate to advanced skiers who are confident in glaciated avalanche terrain and can handle unpredictable snow conditions.
The Ortler Circuit offers a mix of technical challenges and diverse terrain that adds depth to the experience. Skiers traverse heavily glaciated areas, ascend high peaks (some requiring crampons for short sections), and enjoy long, rewarding descents back to the huts. While the elevations here are slightly lower than those in the Western Alps, the terrain is quintessentially alpine.
The predominantly northerly-facing runs help preserve powder conditions well into May, making late-season skiing exceptional. Peaks like Palon de la Mare (3,704 meters) and Monte Pasquale (3,553 meters) provide a variety of objectives throughout the journey.
Most itineraries for the Ortler Circuit span six to seven days. This timeframe allows skiers to complete the full loop, tackle several summits, and fully enjoy the hut-to-hut experience without feeling rushed.
Spring is the prime season for the Ortler Circuit, with ideal conditions from mid-March through late April. March often brings storms and fresh powder, while April typically offers more stable conditions, perfect for summit attempts.
"The good time to be skiing there is in the spring, mid-March to late April. March can bring more storms and powder skiing, while April is time to ski from the summits." – Pat Ormond, IFMGA Mountain Guide
Spring skiing here comes with several perks: stable snow, manageable avalanche risks, and sunny skies with minimal wind. The northerly-facing slopes help maintain snow quality into May, but timing descents is critical to avoid overly softened snowpacks from solar warming. This delicate balance between optimal snow conditions and rising temperatures underscores the importance of planning your trip carefully.
The Vanoise National Park Traverse offers an unforgettable ski adventure through France's largest Alpine national park. Sitting next to Italy's Gran Paradiso National Park, these two parks together cover over 1,250 km² (about 480 square miles) of untouched wilderness. This route is celebrated for its incredible wildlife sightings and its mix of terrain, featuring rugged valleys, vast glaciers, and over 300 peaks soaring above 3,000 meters (9,843 feet).
The journey takes skiers through a stunning array of landscapes, starting at the lively Trois Vallées ski area and leading to remote glacier descents and challenging alpine sections. Along the way, you'll encounter abundant wildlife, making it a perfect blend of natural beauty and skiing adventure. A network of mountain huts provides basic but dependable shelter throughout the route.
The tour begins in Val Thorens, where ski lifts whisk you up to Col de Thorens (3,100 m/10,171 ft). From there, you’ll skin across glaciers to Col de Gebroulaz (3,417 m/11,211 ft) before descending long glacier runs to huts like Peclet Polset and Roc de la Peche. The following days include climbs like Col de Labby (3,324 m/10,906 ft), where crampons are essential for the steep final stretch, and the more technical ascent of Dome de Chasseforet at 3,586 meters (11,765 feet). These features highlight the traverse's challenging nature.
The Vanoise National Park Traverse is ideal for intermediate ski tourers with prior hut-to-hut touring experience. You’ll need to handle slopes up to 35° and adapt to varying snow conditions. The physical demands are no small feat, with daily climbs reaching up to 1,400 meters (4,593 feet) of elevation gain and descents as steep as 2,000 meters (6,562 feet).
Technical skills are a must. You’ll need to be proficient with crampons and ice axes for slopes nearing 40°. Glacier skiing and occasional roped climbing are also part of the experience, so familiarity with glacier travel is essential. Expect daily outings to last 5–7 hours, with climbs ranging from 600 to 1,300 meters (1,969–4,265 feet) and 3–5 hours of skinning.
This traverse covers about 5,200 meters (17,060 feet) of uphill skinning and 6,450 meters (21,162 feet) of downhill skiing, offering a diverse range of terrain. You’ll tackle steep ascents, glacier descents, and high-altitude alpine passages above 3,000 meters (9,843 feet), with plenty of glacier skiing along the way.
Key highlights include the glacier crossing at Col de Gebroulaz, the steep climb to Col de Labby requiring crampons, and the intricate descent from Dome de Chasseforet past Dome des Sonnailles. The final day presents several col options along the ridgeline, leading to satisfying north-facing descents into Val d'Isère. Familiarity with the terrain is crucial when planning this six-day adventure.
Most skiers complete the traverse in six days, allowing for a relaxed pace, time to enjoy the scenic hut-to-hut experience, and flexibility for weather-related delays.
The prime window for this tour is mid-March through April, when the snowpack is more stable and temperatures are milder. Always check the local weather and avalanche forecasts before setting out.
The Ötztal Ski Traverse in Austria's Tyrol region is a week-long alpine adventure that combines technical skiing with stunning natural scenery. This classic horseshoe-shaped route circles the Ventnertal valley, offering breathtaking glacier skiing, north-facing descents, and the opportunity to summit Wildspitze (3,770 m/approximately 12,362 ft), the tallest peak in Tyrol.
Unlike the often-crowded Haute Route, the Ötztal Traverse provides a more serene experience, featuring fewer skiers and exceptional peak skiing opportunities, making it a favorite among seasoned skiers. As with other iconic alpine tours, the route also boasts an impressive network of mountain huts.
The huts along the way offer a touch of comfort in the wilderness, with amenities like hot showers, full bar service, and hearty restaurant meals. These huts allow for two-night stays, enabling skiers to pack lighter and adjust their schedules as needed.
The traverse takes skiers into high-altitude terrain, often above 3,000 m (9,843 ft), with glacier crossings over the Gurgler Ferner and the Grosser and Kleiner Vernagt Glaciers. However, poor visibility can make glacier travel slow or even impossible, so weather conditions play a critical role in the journey.
This route is best suited for intermediate to advanced skiers with prior experience in multi-day hut tours and solid physical endurance. Daily ascents range from approximately 2,953 to 4,593 ft, with 3–5 hours of skinning per day over an 8-hour stretch. Skiers should also be prepared for exposed ridge scrambling, often requiring crampons. The physical and technical demands make this traverse a rewarding challenge for those up to the task.
The Ötztal Traverse offers a mix of alpine experiences, with glacier skiing as its centerpiece. North-facing descents often deliver untouched powder, and multiple ski summits are accessible from the huts. Skiers will navigate a balance of moderate glacier crossings and steeper, more technical sections that require precision and skill.
Most groups complete the traverse in six to seven days. This timeframe allows for a thorough exploration of the route, while also accounting for potential weather delays and rest days at the huts.
The ideal time to tackle the Ötztal Ski Traverse is between early March and late April. March typically offers excellent powder conditions, while April brings more stable weather, making glacier travel safer and more predictable.
The Aiguilles Rouges Traverse is a standout spring ski tour in the French Alps, offering a mix of technical challenges and jaw-dropping scenery. Situated across the valley from the Mont Blanc Massif, this route delivers panoramic views while demanding solid mountaineering skills. The classic Crochues-Bérard route takes skiers across two alpine cols, navigating diverse terrain before reaching Le Buet.
This tour is a quintessential alpine ski experience, blending short glacier approaches, ridge scrambling, and steep descents. Essential gear includes a crevasse rescue kit and crampons for icy sections. The route also involves ridge climbing over loose rock and navigating pinnacles, particularly on the easier east side. Skiers are rewarded with a thrilling steep descent into the Vallon des Ignes.
One of the highlights is the Col de Belvédère, which offers a striking descent through a narrow 262-foot (80 m) couloir at a 40° angle. The Col du Beugéant adds an extra layer of technicality, requiring an abseil and a challenging descent into the Vallon de Bérard. These features contribute to the tour's reputation as a demanding yet exhilarating adventure.
The Aiguilles Rouges Traverse is best suited for intermediate to advanced skiers with strong mountaineering skills. While the Crochues-Bérard route is considered intermediate, the steep terrain demands respect from all participants. For example, ascending to the top of Col des Crochues typically takes about 40 minutes for a fit skier. Avalanche-prone sections, especially after Col des Crochues, require caution, and ski crampons may be necessary on icy days. The Col de Belvédère section further raises the technical bar.
The route offers a mix of terrain, from technical couloirs and exposed ridges to open glacier skiing. For those seeking a slightly less intense challenge, the Col de Bérard route is the most straightforward option. However, skiers will still encounter exposed ridge climbing and loose rock scrambling before tackling a dramatic descent into the Vallon des Ignes. Easier snow slopes at the end provide a smoother finish, while adventurous participants might even aim to summit nearby peaks.
Most skiers complete the Aiguilles Rouges Traverse in a single day, though the route can be extended into a multi-day journey depending on personal goals and conditions. The classic Crochues-Bérard route typically takes a full day, while adding technical sections, such as the Col du Beugéant, can lengthen the overall time.
The ideal time for this traverse is from mid-March to mid-April, when snow conditions are favorable, daylight hours are longer, and temperatures are milder, reducing avalanche risks. In April and May, snow above 6,562 feet tends to be especially reliable, with a sun-softened surface over a firm base.
Early starts are key to avoiding wet snow slides on the climb to Col des Crochues, but starting too early could mean icy conditions. Spring’s freeze-thaw cycles often stabilize slopes, though strong afternoon sun can make south- and west-facing areas more unpredictable. As with any Alpine adventure, thorough preparation and condition monitoring are essential for a safe and enjoyable traverse.
Here’s a quick breakdown of eight top-tier ski touring routes, highlighting their unique terrain, skill requirements, and ideal timing. Each route caters to varying levels of expertise and time commitments, so there’s something for everyone.
The Haute Route is the ultimate challenge, demanding advanced skills and 6–7 days of glacier travel. The Bernese Oberland Traverse combines excellent powder skiing with moderate-to-advanced difficulty over 5–6 days. For those new to alpine touring, the Gran Paradiso Ski Tour offers a great starting point with moderate terrain over 4–5 days. Meanwhile, the Silvretta Traverse provides a more relaxed multi-day experience, featuring comfortable huts and easier terrain.
Here’s a snapshot of the key details:
| Route | Location | Difficulty | Duration | Terrain Highlights | Best Months | SummitGuides Available |
|---|---|---|---|---|---|---|
| Haute Route | France/Switzerland | Advanced | 6–7 days | Glacier travel, steep couloirs | March–April | Yes – from $2,110 |
| Bernese Oberland | Switzerland | Intermediate–Advanced | 5–6 days | High peaks, excellent powder | Mid-March to early May | Yes |
| Gran Paradiso | Italy | Intermediate | 4–5 days | Open glaciers, technical couloirs | April–early May | Yes – from $1,540 |
| Silvretta Traverse | Austria/Switzerland | Beginner–Intermediate | 4–5 days | Gentle glaciers, hut comfort | March–April | Yes |
| Ortler Circuit | Italy | Intermediate | 5–6 days | Dramatic peaks, varied terrain | April–May | Yes |
| Vanoise Traverse | France | Intermediate | 4–5 days | National park, moderate glaciers | March–April | Yes |
| Ötztal Traverse | Austria | Intermediate | 4–6 days | High alpine huts, glacier skiing | March–May | Yes |
| Aiguilles Rouges | France | Intermediate–Advanced | 1 day | Technical couloirs, ridge climbing | Mid-March to mid-April | Yes |
The Ortler Circuit and Bernese Oberland stand out for their variety, offering a mix of terrain and breathtaking scenery. On the other hand, the Vanoise Traverse keeps things a bit more relaxed, with moderate glacier skiing in a protected park setting. If time is tight, the Aiguilles Rouges packs advanced terrain into a single-day adventure.
Seasonal timing is key. Higher-altitude routes like the Haute Route and Ötztal Traverse can stretch into May, while lower-elevation tours are best enjoyed from March to April.
"Most of my 'best day ever' in the mountains have been with guides, as I use them to do climbs that I don't have the technical ability or risk tolerance to do with friends. Plus, their familiarity with routes means we can go fast, which is always a good thing. I use the occasional ski guide because they usually know where the secret powder stashes are!"
– Graham Longford
SummitGuides offers expert-led trips for most of these routes, with IFMGA-certified guides ensuring a safe and optimized experience. Whether you’re chasing technical challenges or scenic tours, this guide helps you find the perfect match for your skills and goals.
Planning ahead is the secret to making the most out of your spring ski touring trip in the Alps. Spring skiing comes with its own set of challenges, from unpredictable weather to international travel logistics. A solid plan ensures you’re ready to handle it all.
The first step is choosing a route that matches your skill level and the conditions you’re aiming for. Spring skiing works best when overnight temperatures drop below 30°F (-1°C) for at least 5–6 hours, creating the firm freeze needed for quality corn snow.
Pay close attention to elevation and slope orientation. Higher elevations hold better snow conditions later into the day, while lower slopes soften quickly as temperatures rise. East-facing slopes catch the sun first, followed by south and west-facing ones, so plan your timing accordingly throughout the day.
Always have a backup plan in case conditions change unexpectedly, which is common during spring. Once you’ve nailed down your route and timing, book your accommodations and prepare your gear.
Once your route is set, securing accommodations should be your next move. Hut reservations, especially for trips between late March and early May, need to be made as early as mid-February. Alpine Club huts in countries like Germany, Austria, Switzerland, and Italy are part of a centralized booking system, making the process simpler. Reservations can be completed online or by contacting the huts directly via phone or email.
When reaching out, use polite and concise messages in the local language. Most huts require a deposit when booking, and it’s a good idea to confirm your reservation about two weeks before your trip. Be prepared for extras like showers, which typically cost €2–5 for a brief use of less than five minutes.
Spring weather can be unpredictable, so packing versatile gear is a must. Start with thin, moisture-wicking base layers – merino wool is a great option. For outerwear, softshell jackets are ideal for breathability on most spring days, but pack a Gore-Tex hardshell in case of storms.
Don’t forget lightweight insulating midlayers for chilly mornings, thin waterproof gloves (ice-climbing gloves work well), and sunglasses instead of goggles for sunnier conditions. Sunscreen and SPF lip balm are non-negotiable due to the intense alpine sun.
On the technical side, pack ski crampons for icy ascents in the mornings and bring skin wax to prevent snow from clumping on your climbing skins. A dual-rated helmet for both skiing and climbing is a smart choice if you’ll be navigating technical terrain. Keep in mind that dark rocks heat up faster than snow, which can impact conditions in couloirs.
Decide whether train travel or a rental car works best for reaching your starting point from the airport. Trains are often a convenient option, especially for resorts with stations close to the lifts. If you opt for a rental car, make sure it comes with winter tires and snow chains.
For groups of 10 or more traveling in Switzerland, luggage transfer costs are set to increase to 500 CHF (around $550) in January 2025, covering up to 50 pieces. Additionally, groups of this size can save 30% on Swiss Rail tickets.
Most expenses, including hut stays, meals, and local transportation, will need to be budgeted in euros (€). Costs for huts vary depending on the location and season. For example, SummitGuides tours for routes like Gran Paradiso start at €1,540 (about $1,680).
Keep a close eye on weather forecasts and avalanche bulletins. Corn snow, which is ideal in the morning, can quickly turn into slush as temperatures rise. As Reagan puts it:
You'd have to be a wizard to ski from the summit back to the car in perfect corn. At the end of the day it's probably going to be manky, so I need to choose terrain on my egress that's not going to avalanche on me.
Be honest about your fitness level and choose tours that align with your climbing ability. If glacier travel is new to you, evaluate whether you have the necessary skills or if hiring a guide would be a better option.
Professional guides can make a huge difference. They bring local knowledge, help with timing, and adjust plans based on real-time conditions – all of which are invaluable in the ever-changing spring environment.
The Alps offer a stunning backdrop for spring ski touring, blending jaw-dropping scenery with the distinct thrill of skiing on corn snow. Whether it’s the iconic Haute Route linking Chamonix to Zermatt or the demanding Bernese Oberland Traverse, these eight routes highlight the incredible variety of alpine terrain waiting for ski mountaineers to explore.
The key to a successful spring ski tour lies in mastering the freeze-thaw cycles and timing your outings just right. To find that "magic window" for perfect corn snow, you'll need to monitor temperatures closely and start early to take advantage of the firm morning snowpack. While these conditions can be ideal, they also require a sharp focus on safety.
Meticulous planning is essential to reduce avalanche risks, as spring conditions can shift quickly. Warming temperatures can weaken cornices and increase the likelihood of wet avalanches. Always carry avalanche safety gear and remember that even a small loss of body fluids - about 1% of your body weight - can significantly impact your performance.
Preparation is the foundation of both safety and enjoyment. Whether you're tackling the glaciers of Gran Paradiso or navigating the steep couloirs of the Aiguilles Rouges, having the right gear, reading the conditions accurately, and respecting the mountains will elevate your experience from merely surviving to truly thriving.
If you're new to the European alpine terrain or feel uncertain about specific regional conditions, hiring a local guide is a wise choice. Professional guides bring invaluable expertise, assist with real-time decisions, and can accelerate your learning curve in the backcountry.
They know that safety comes from sound risk management and not just hoping for the best. Start with routes that match your skill level and build confidence one step at a time.
Ultimately, careful route selection and thorough preparation are the cornerstones of a safe and rewarding alpine adventure. These eight routes are just the beginning of what the Alps have to offer in spring. Each one has its own personality, challenges, and unique rewards. Begin with trails suited to your abilities, gain experience gradually, and always keep your plans flexible. While the mountains will wait, those perfect spring conditions won’t - seize the moment when they come together.
What It Takes to Complete the Haute Route Ski Tour
Tackling the Haute Route ski tour isn’t just about enjoying breathtaking alpine views - it’s a serious adventure that demands a mix of technical skills, physical endurance, and prior experience.
First, you need to be confident skiing off-piste and handling tricky terrain. Expect steep sections and unpredictable snow conditions that require solid technique and adaptability. On top of that, strong physical fitness is non-negotiable. Each day involves skinning uphill for 3,900 to 4,000 feet (roughly 5–6 hours) and skiing for as long as 8 hours. That’s a lot of time on your feet, so stamina is key.
Previous ski touring experience is strongly advised. You’ll also need to be familiar with basic mountaineering skills, such as crevasse rescue and climbing steep snow. These aren’t just helpful - they could be lifesaving.
This tour is tough, but with the right preparation, it’s an incredible way to experience the beauty of the Alps while staying safe and confident along the way.
Spring Ski Touring in the Alps: Timing and Preparation
When it comes to spring ski touring in the Alps, timing plays a crucial role. The changing weather and snow conditions during this season are largely dictated by the melt-freeze cycle. To make the most of your experience, plan to start early in the morning when overnight temperatures have dipped below freezing. This creates a firm and stable snowpack, offering ideal conditions for skiing. As the day warms up, the snow softens, so aim to wrap up your tour before it turns slushy or unstable.
Be mindful of the terrain and how the sun affects it. Slopes that get plenty of sunlight warm up quicker, often providing better skiing conditions earlier in the day. On the other hand, shaded areas tend to stay icy for longer periods.
Equipping yourself with the right gear is equally important. Make sure your skis are properly tuned and waxed to handle the variable snow conditions that spring often brings. And don’t forget to check the weather forecast and avalanche reports before setting out - spring weather can be unpredictable, and conditions can shift quickly.
Hiring a certified guide for spring ski touring in the Alps isn’t just about safety - it’s about making the most of your adventure. These professionals bring a wealth of knowledge about the local terrain, snow conditions, and ever-changing weather patterns. They’ll help you find the best routes while steering clear of potential hazards, ensuring your experience is both secure and smooth.
Beyond just guiding, they can offer tips on skiing techniques and mountaineering skills, giving you the confidence to tackle challenging slopes. Plus, they take care of critical safety checks, like evaluating avalanche risks and keeping an eye on shifting weather, so you can fully immerse yourself in the stunning alpine views. With their expertise and knack for storytelling, a certified guide can transform a good trip into an unforgettable journey, making them an essential part of your spring ski touring plans.
Scaling Mont Blanc is no small feat. At 4.810 m, the mountain challenges climbers with unpredictable weather, hidden crevasses, and high-altitude conditions. Hiring a professional guide can make the difference between a safe, successful summit and a risky attempt. Here’s why:
For €2.890, programs like those offered by SummitGuides provide six-day climbs with certified experts, ensuring a safer and more enjoyable experience. Whether you're a beginner or seasoned mountaineer, a guide is your best ally on Mont Blanc.
Mont Blanc is famous for its tough conditions, and climbing it demands meticulous preparation. IFMGA/UIAGM certified guides bring a wealth of training in risk assessment, rescue techniques, and emergency response - skills that can make all the difference during an ascent.
These professionals carry essential safety equipment, including avalanche transceivers, medical kits, and communication tools. They also keep a close eye on climbers' physical conditions, watching for signs of altitude sickness, hypothermia, or exhaustion. Most importantly, they know when to halt an ascent, always putting safety above summiting.
The mountain's rugged terrain, including crevasse-laden areas like the Vallée Blanche and Glacier du Géant, calls for advanced rope work and precise route-finding. Guides rely on years of experience to evaluate snow bridge stability and detect hidden crevasses. They’re also prepared to handle technical rescues if the situation demands it. Beyond responding to immediate risks, their deep knowledge of Mont Blanc’s dynamic environment helps them anticipate and mitigate potential hazards.
In addition to their safety expertise, guides offer critical local knowledge. Mont Blanc’s weather is notoriously unpredictable, making constant monitoring essential.
Professional guides stay in close contact with meteorological services and other teams to receive real-time updates, adjusting plans as conditions evolve. For example, navigating the Goûter Couloir requires precise timing, and guides are adept at choosing safer routes or alternatives when the standard path becomes too risky.
This intimate understanding of the mountain allows guides to adapt plans on the fly, often opting for safer options like the Three Monts Route when necessary.
Mont Blanc's environment is known for its unpredictable nature, with conditions shifting rapidly throughout the climbing season. Local guides bring a level of expertise that goes far beyond what standard resources can offer.
They have an intimate understanding of the mountain's microclimates, seasonal weather patterns, and alternative routes that might be safer during challenging conditions. This on-the-ground knowledge allows them to make quick, informed decisions as situations evolve.
Professional guides maintain close communication with hut wardens and local weather services to stay updated on current conditions. This real-time information helps them pinpoint hazardous areas and adjust routes on the fly, ensuring the safest possible climb for their clients.
Mont Blanc’s varying elevations add another layer of complexity to any ascent. Guides are well-versed in how conditions differ between lower-altitude refuges and the higher-altitude shelters, where temperatures plummet, and winds intensify.
This altitude-specific insight is vital when planning summit attempts, as it helps avoid worsening weather later in the day. Early summer often brings unstable snow bridges and a higher risk of avalanches, while later in the season, firmer ice may require different equipment and strategies.d
Guides also have a sharp eye for reading the terrain. They can distinguish between stable snow and slopes that might be prone to avalanches, ensuring climbers take the safest paths. They’re always ready with backup plans, a skill that becomes especially critical during the final summit push. This stage often involves exposed ridges where the margin for error is slim, making their expertise invaluable.
Climbing Mont Blanc comes with its fair share of logistical hurdles. Take hut reservations, for example - securing a spot at popular refuges like the Goûter Hut or Tête Rousse Hut can be a nightmare during the peak season (June through September).
These places fill up months in advance, but professional guides often book them well ahead of time, saving climbers the hassle of navigating this competitive process on their own.
But it doesn’t stop there. Guides meticulously plan every detail of the journey, from departure times in Chamonix to coordinating cable car rides and refuge stops. Their timing ensures climbers acclimatize properly while avoiding risky afternoon weather and overcrowded trails.
Then there’s the gear. Mont Blanc requires specialized equipment like crampons, ice axes, and mountaineering boots. Guides simplify this process by providing detailed equipment lists and arranging rentals through trusted local shops in Chamonix.
This ensures climbers have gear that fits well and meets the demands of the climb. Additionally, guides organize transportation between key points - like the Aiguille du Midi cable car station and various refuges - leveraging their local knowledge and connections to keep things running smoothly.
Permits and paperwork can also be a headache, especially since requirements vary by route and season. Guides take care of these administrative tasks, securing the necessary permits and clarifying border-crossing rules when routes dip between France and Italy. This ensures climbers stay compliant and can focus on the adventure ahead.
Flexibility is another key advantage. Weather conditions can change quickly, forcing route adjustments. Experienced guides have backup plans, thanks to their relationships with multiple refuge systems and their knowledge of alternative descents. This adaptability can be the difference between a safe, enjoyable climb and a risky situation.
Managing group dynamics adds another layer of complexity, especially with larger teams. Guides ensure everyone stays on the same page, coordinating gear distribution and pacing the group to match varying fitness levels. They also handle the social challenges that can arise in high-stress situations, keeping the team united and focused through the multi-day ascent.
While hiring a guide is no small expense - costs start around €2,890 for a six-day program - their local partnerships often translate to better rates for accommodations and gear. More importantly, their expertise in managing logistics elevates the entire climbing experience, making the journey as seamless and enjoyable as possible.
Standing at an impressive 4.810 meters, Mont Blanc demands a thoughtful acclimatization process, and professional guides excel at helping climbers prepare. They design the climb to align with your body's natural adaptation, starting at the lower elevations of Chamonix (1.035 meters), gradually moving to the Tête Rousse Hut (3.167 meters), and eventually reaching the Goûter Hut (3.817 meters).
This gradual ascent gives your body the chance to adjust, producing more red blood cells to cope with the thinner air.
Along the way, guides incorporate techniques like breathing exercises, hydration tracking, and pacing adjustments tailored to each climber’s response. These steps are crucial for reducing the risk of altitude sickness and ensuring you're ready for the physical demands ahead.
But acclimatization is just part of the equation. Guides also focus on building the mountaineering skills you’ll need for Mont Blanc’s challenges.
For climbers unfamiliar with the technical demands, they offer hands-on training in essential techniques like using crampons, handling an ice axe, and traveling safely as part of a roped team.
They’ll teach you how to self-arrest in case of a slip on icy slopes and how to navigate through crevassed areas. They also help optimize your pack weight, adjust your stride, and fine-tune your energy management for summit day.
Another key skill guides share is weather reading. They’ll show you how to interpret cloud formations that hint at incoming storms, explain the shifts in wind patterns around Mont Blanc’s massive terrain, and help you recognize when conditions are becoming unsafe. These lessons aren’t just helpful for the current climb - they’re skills you can carry into future alpine adventures.
The multi-day guided programs allow for steady, progressive learning, with each day introducing more advanced techniques under expert supervision. Climbers who work with IFMGA/UIAGM-certified guides, such as those from SummitGuides, benefit from professionals who’ve undergone extensive training and testing. These certifications ensure the guides have not only deep local knowledge but also strong teaching and rescue skills.
The cost of professional guidance includes more than just the climb itself. It’s an investment in education that equips you with the skills and confidence needed for future mountaineering pursuits.
Beyond ensuring safety and handling logistics, professional guides take your climb to the next level by tailoring every aspect of the experience to your individual needs. This personalized approach plays a key role in improving your chances of reaching the summit.
Guided climbs are designed to match your pace, skill level, and goals, creating a safer and more effective path to success compared to going solo.
The schedule adapts to how your body responds to altitude, giving you the flexibility to train or rest as needed.
For instance, if you’re acclimating well at the Tête Rousse Hut, your guide might extend training sessions to boost your confidence.
On the other hand, if technical sections like crampon use or roped travel prove challenging, they’ll dedicate extra time to coaching you through them.
Equipment preparation is another area where guides make a big difference. They’ll carefully review your gear list, ensuring you’re carrying only what’s necessary for Mont Blanc’s specific conditions.
This might mean swapping out heavier items for lighter alternatives or upgrading key pieces of gear to handle the early morning summit push.
The expertise of IFMGA/UIAGM-certified guides, like those from SummitGuides, adds another layer of value. With over 20 years of alpine experience, they know when to provide encouragement and when to adjust plans for safety.
Their ability to manage itineraries flexibly is especially critical. If weather conditions shift, they can extend your time at altitude or adjust departure times from the Goûter Hut to align with favorable weather windows. These real-time decisions, informed by forecasts from multiple sources, maximize your chances of a clear and calm ascent.
Throughout the expedition, guides provide constant, personalized attention. This not only increases your summit success rate but also enhances the overall experience by minimizing risks and setbacks along the way.
The table below highlights the key differences between guided climbs and independent attempts on Mont Blanc. It outlines critical factors that influence safety, preparation, and success.
| Factor | Guided Climb | Independent Climb |
|---|---|---|
| Safety & Risk Management | Guided climbs rely on IFMGA/UIAGM-certified guides who make real-time safety decisions. | Safety depends entirely on your own experience and judgment. |
| Route Planning & Navigation | Professional guides choose routes based on current conditions and timing for the best outcome. | Requires thorough pre-trip research and on-the-spot decision-making without local expertise. |
| Weather & Conditions | Guides provide insights into local weather patterns and microclimates. | Limited to general weather forecasts without in-depth knowledge of local conditions. |
| Logistics Coordination | Guides handle hut reservations, permits, and schedules, simplifying the process. | You must book accommodations at Tête Rousse or Goûter huts, often months in advance. |
| Equipment Management | Guides review gear lists, recommend Mont Blanc-specific equipment, and provide group safety gear. | You’re responsible for researching, purchasing, and carrying all necessary gear independently. |
| Acclimatization Support | Structured acclimatization plans are tailored to your altitude response. | Acclimatization is self-managed without professional input or adjustments. |
| Technical Skills Training | Guides offer on-route coaching for crampons, roped travel, and glacier navigation. | Requires prior mastery of technical skills or learning through trial and error. |
| Summit Success Rate | Higher success rates due to expert timing, route selection, and personalized pacing. | Lower success rates often result from inexperience and self-imposed time pressures. |
| Cost Range | Starts at €2,890 for a 6-day guided Mont Blanc program, including guide fees and accommodations. | Lower initial costs but higher potential for unforeseen expenses. |
| Emergency Response | Guides provide immediate access to rescue protocols and professional emergency decisions. | Relies on your personal emergency preparedness and external mountain rescue services. |
While independent climbs might seem more budget-friendly upfront, guided climbs offer the expertise, safety measures, and support required for tackling Mont Blanc's challenges.
Opting for a professional guide when tackling Mont Blanc transforms a potentially hazardous climb into a meticulously planned adventure. The five key advantages outlined earlier underscore why this investment is worthwhile for climbers of all experience levels.
The comparison table highlights how guided climbs address the hurdles that independent climbers often face. From accurate, real-time weather updates to well-practiced emergency response plans, professional guides bring a level of expertise that can make all the difference between achieving the summit and encountering unnecessary risks. These services elevate the experience, ensuring a safer and more successful climb.
SummitGuides, with over 20 years of Alpine guiding expertise, offers a 6-day Mont Blanc program starting at €2,890. Our IFMGA/UIAGM-certified guides are dedicated to crafting personalized mountaineering experiences, focusing on safety and environmental responsibility. The program includes expert leadership, seamless logistics, and essential safety gear.
With the right guide, you'll gain the preparation, knowledge, and support needed to tackle Mont Blanc's challenges. Whether you're new to high-altitude climbing or a seasoned mountaineer aiming to boost your chances of success, professional guidance is the key to a safe and unforgettable ascent.
Mont Blanc guides hold the IFMGA/UIAGM certification, which is a highly regarded qualification requiring rigorous training in alpine safety, technical climbing, route navigation, and client care. In addition to this, they are state-certified and fully insured professionals, often bringing years of experience guiding in the Alps.
These credentials ensure that your guide is prepared to manage tough conditions, prioritize your safety, and offer expert assistance throughout your climb. Their deep knowledge of the region and extensive training make them essential companions for a safe and unforgettable Mont Blanc adventure.
Guides are essential in preparing climbers for Mont Blanc's high-altitude environment. By planning gradual ascents and scheduling rest days, they help reduce the risk of altitude sickness, giving your body the time it needs to adjust naturally and making the climb safer.
Beyond pacing, guides offer critical training in technical skills like using crampons, handling ice axes, and navigating glaciers. This practical instruction, paired with months of physical preparation, equips climbers with the confidence and skills required to face the unique demands of Mont Blanc.
Guides handle essential logistics for a Mont Blanc climb, including securing mountain hut reservations, charting routes, organizing meals, and overseeing on-site arrangements. Their expertise ensures everything runs smoothly.
With a professional guide managing these details, climbers can fully immerse themselves in the adventure and focus on the ascent itself. This not only reduces the stress of planning but also adds to the overall safety and enjoyment of the journey.
Mont Blanc, standing at 4.810 m (15.781 feet), is a dream for climbers but comes with challenges like unpredictable weather, high altitude, and risks of altitude sickness. Proper acclimatization and choosing the right route are key to a safe ascent. Here's what you need to know:
Mont Blanc is challenging but achievable with the right planning, acclimatization, and respect for the mountain’s risks.
Mont Blanc offers several paths to its summit, each with unique challenges and requiring different levels of preparation. Two of the most popular routes stand out for their distinct demands on climbers.
The Gouter Route is often considered the easiest way to reach Mont Blanc's summit, making it a favorite for many climbers. Starting in Chamonix, the route passes through two key huts: the Tête Rousse Hut at 3,167 meters (10,499 feet) and the Gouter Hut at 3,835 meter (12,582 feet).
This route's gradual altitude gain makes it ideal for acclimatization. Many climbers typically spend their first night at Tête Rousse to adjust to the elevation, followed by a second night at the Gouter Hut before attempting the summit (or on the way back from the summit).
From a technical perspective, this route is manageable for most climbers with basic glacier travel skills. You'll need to be comfortable using crampons and an ice axe, especially when crossing the Grand Couloir - a steep gully notorious for frequent rockfalls. Moving quickly and carefully through this section is critical.
Weather plays a significant role in the safety of this route. The exposed ridges above the Gouter Hut can become treacherous during storms, with plummeting temperatures and strong winds. However, in good weather, the route’s straightforward nature allows for efficient climbing.
The Three Monts Traverse is a more challenging and technical option, requiring climbers to cross three peaks: Mont Blanc du Tacul, Mont Maudit, and Mont Blanc itself. Unlike the Gouter Route, this path exposes climbers to high altitudes right from the start, making acclimatization even more critical.
The ascent begins at the Aiguille du Midi cable car station, perched at 3,842 meters (12,605 feet). This immediate jump in elevation can increase the risk of altitude sickness, so prior acclimatization is essential.
Technically, this route is far more demanding. Climbers face steep ice slopes, exposed ridge crossings, and complex glacier navigation. Mastery of ice axe techniques, crampons, and rope handling is a must. The knife-edge ridges and steep sections require precision and confidence, as mistakes can lead to severe consequences.
To prepare, many climbers stay at the Cosmiques Hut (11,135 feet or 3,394 meters) for acclimatization, using it as a base for day trips to higher altitudes. With much of the route above 3,658 meters (12,000 feet), even experienced climbers need to stay alert for signs of altitude sickness.
As with the Gouter Route, unpredictable weather can introduce additional hazards, so flexibility and caution are key.
One of the most serious objective dangers on the Three Monts Traverse is the constant threat posed by serac falls. Seracs are unstable blocks of glacial ice that can collapse without warning, releasing massive amounts of ice and snow onto the slopes below. These events are nearly impossible to predict and have been responsible for some of the most tragic accidents on the route. In recent years, the frequency and severity of serac collapses on Mont Blanc du Tacul and Mont Maudit have been a growing concern for both climbers and guides.
A devastating accident took place on Mont Maudit at Col Maudit on August 16, 2016. As a group of climbers passed beneath a towering outcrop of seracs at around 4,100 meters, a collapse swept across the slope, killing three climbers instantly. The tragedy highlighted the extreme exposure in this section, where climbers are forced to pass directly under unstable ice cliffs with little possibility of protection or escape.
Another significant event occurred on August 5, 2024, when a huge serac broke loose from the north face of Mont Blanc du Tacul. The resulting avalanche engulfed around fifteen climbers on the normal route, leading to one confirmed death and four serious injuries. The incident made international headlines and reignited the debate about whether the Three Monts Traverse can ever truly be considered “safe,” given the scale of the objective risks.
These examples demonstrate the inherent unpredictability of serac falls. Despite precautions, climbers must accept that exposure to this risk is unavoidable on the Three Monts Traverse.
| Route | Difficulty | Technical Skills Required | Acclimatization Demand | Duration | Starting Elevation |
|---|---|---|---|---|---|
| Gouter Route | Moderate | Basic glacier travel and crampon use | Gradual progression aids acclimatization | 2–3 days | 4,807 ft (1,465 m) |
| Three Monts Traverse | Advanced | Advanced ice climbing and ridge work | High – prior acclimatization essential | 1–2 days | 12,605 ft (3,842 m) |
Choosing between these routes depends on your experience and acclimatization schedule. The Gouter Route offers a more step-by-step approach to altitude adjustment, while the Three Monts Traverse is better suited for those with advanced skills and prior acclimatization. Both routes demand close attention to weather conditions and the willingness to retreat if necessary.
If you're planning to climb Mont Blanc, understanding altitude sickness is not just helpful - it's essential. Reduced oxygen levels at high altitudes can lead to serious health issues if not managed properly. Here’s a breakdown of the symptoms, prevention strategies, and when it’s critical to descend.
Altitude sickness comes in varying degrees of severity, and recognizing the signs early can make all the difference.
Acute Mountain Sickness (AMS)
This is the mildest form and commonly affects climbers above 8,000 feet (2,438 meters). Symptoms include headaches that worsen over time, nausea, appetite loss, extreme fatigue, dizziness, and trouble sleeping. A general feeling of being unwell can also occur.
High Altitude Pulmonary Edema (HAPE)
HAPE is a dangerous condition caused by fluid buildup in the lungs. Warning signs include a dry cough that might produce pink or white frothy sputum, severe fatigue even while resting, and difficulty breathing, even with minimal effort. Blue lips or fingernails and a rapid resting heart rate are also key indicators. HAPE often develops 24 to 72 hours after reaching higher altitudes and requires immediate attention.
High Altitude Cerebral Edema (HACE)
HACE is the most severe form of altitude sickness and involves swelling in the brain, which can be fatal if untreated. Symptoms include intense headaches unresponsive to painkillers, vomiting, confusion, and loss of coordination. Even simple tasks like walking straight or tying your boots may become challenging. Behavioral changes, such as irritability or unusual decision-making, are critical red flags.
Taking preventive steps can significantly reduce your risk of altitude sickness.
Knowing when to descend can save your life. If symptoms worsen, descending immediately is non-negotiable.
Weather conditions may complicate your decision to descend, but your health must always come first. Even seasoned climbers have turned back just hours from Mont Blanc’s summit when symptoms appeared. Remember, the mountain will still be there for another attempt - your safety cannot wait.
Professional guides are trained to spot subtle changes in your behavior or physical condition that you might overlook. Their expertise can be the difference between a safe climb and a medical emergency, making them invaluable for high-altitude adventures.
Now that we've covered altitude sickness and how to prevent it, let's dive into practical acclimatization strategies for Mont Blanc. Proper acclimatization isn't just a suggestion - it's a must. Your body needs time to adjust to the thinner air at higher altitudes, and skipping this process could lead to serious risks.
The key to successful high-altitude climbing lies in understanding how your body adapts to reduced oxygen levels. The golden rule? Take it slow. Gradually increasing altitude over several days helps your body adjust, and the "climb high, sleep low" strategy plays a critical role in this process.
Here’s how your body reacts: Within 24 hours of exposure to higher altitudes, it starts producing more EPO, which boosts your red blood cell count to carry oxygen more efficiently. After about a week, your hematocrit levels rise significantly. These changes can't be rushed - they require time.
Sleeping at lower elevations after climbing higher helps your body recover. For Mont Blanc, a staged approach works best. Spend two nights at altitude in a mountain hut. This gradual progression gives your body the time it needs to adapt.
If you’ve been to high altitudes before, your body may adjust more quickly. Building on these basics, let’s look at a 6-day acclimatization plan tailored for Mont Blanc.
A six-day plan is the minimum recommended for Mont Blanc. Shorter programs, like five days, often don’t allow enough time for proper acclimatization. Here’s a tried-and-true schedule:
This schedule allows your body to go through the necessary adaptation phases. Symptoms of Acute Mountain Sickness (AMS) often show up 12-24 hours after reaching altitude but usually ease by the third day as your body acclimatizes.
With a solid general plan in place, fine-tune your acclimatization strategy based on the specific demands of your chosen route.
Goûter Route Acclimatization
The Goûter Route offers excellent hut infrastructure that supports gradual acclimatization. Start with day trips to the Nid d'Aigle (7,651 feet/2,332 meters) before progressing to the Tête Rousse Hut (10,958 feet/3,340 meters). Your key acclimatization night will be at the Goûter Hut (12,582 feet/3,835 meters).
Above 10,000 feet (3,048 meters), aim to increase your sleeping altitude by no more than 1,000 to 1,500 feet (305 to 457 meters) per day. The Goûter Route’s hut system naturally supports this progression. Spend one night at Tête Rousse, then move to Goûter for your final acclimatization before the summit attempt.
Three Monts Traverse Acclimatization
This technical route requires even more thorough acclimatization due to extended exposure to high altitudes. You’ll spend several days above 13,000 feet (3,962 meters), so preparation is critical. Follow the standard six-day schedule, but add an extra day at the Cosmiques Hut with climbs reaching 13,780 feet (4,200 meters) or higher.
Because of the traverse’s length, descending quickly isn’t always possible if altitude issues arise. Prevention is key. Arrive a few days early to spend additional time at altitude before starting your climb - extra acclimatization time can make all the difference.
For either route, rest days are essential, especially for every 3,000 feet (915 meters) of elevation gained. If you experience altitude sickness, stay at your current elevation and rest until symptoms subside before ascending further.
Professional guides, such as those from SummitGuides, bring over two decades of experience in the Alps. Our IFMGA/UIAGM certification ensures we can adjust your plan based on your individual response to altitude, weather conditions, and the unique challenges of each route.
Next, we’ll explore the physical training and gear you'll need to complete your preparation for Mont Blanc.
Getting ready for Mont Blanc means preparing both your body and your gear to handle the mountain's demands. Physical fitness is non-negotiable, as the climb requires stamina and strength. Equally important is equipping yourself with the right gear to navigate the unpredictable conditions.
Mont Blanc will push your endurance to the limit. On summit day, you’ll likely be on the move for 12–15 hours, often in harsh weather and at high altitudes. Building a strong foundation of fitness is essential.
Start with cardiovascular training to increase your aerobic capacity. Activities like running, hiking with a weighted pack, and cycling are excellent choices. Aim for four cardio sessions per week, including one long session lasting 3–4 hours to simulate the physical demands of the climb.
Incorporate strength training to target the muscles that will work hardest during your ascent. Focus on exercises like squats, lunges, step-ups, planks, and deadlifts to build strength in your legs, core, and shoulders.
Since Mont Blanc's altitude reduces oxygen availability, altitude-specific training can also help. If you have access to mountains, train at elevation whenever you can. If not, tools like altitude masks or hypoxic training can be useful, though they’re not substitutes for actual high-altitude exposure.
Start training 12–16 weeks before your climb, gradually increasing intensity and duration. Peak your training 2–3 weeks before departure, then taper off during the final week to focus on rest and recovery. By this point, your fitness will be at its peak.
Don’t overlook pack training. Practice hiking with a 35–40-pound (16–18 kg) pack to get your body accustomed to the additional weight. Start with lighter loads and shorter distances, gradually increasing as your strength improves.
The right gear can make all the difference on Mont Blanc, where the weather is unpredictable and conditions can be extreme.
Even with thorough preparation, climbing Mont Blanc is safer and more efficient with a professional guide. Their expertise can make a significant difference.
Safety Knowledge is a key advantage. IFMGA/UIAGM-certified guides are trained to assess avalanche risks, navigate poor weather, and spot early signs of altitude sickness or hypothermia.
Guides also offer invaluable route knowledge. They know the safest paths through technical sections, the best times to cross riskier areas like the Grand Couloir, and where to find water sources. This insight can save you time and reduce exposure to hazards.
Another benefit is personalized acclimatization. While general schedules work for many, individual responses to altitude vary. A guide can adjust your plan, adding rest days or pushing higher based on your needs.
In addition to safety and navigation, guides often handle logistics like hut reservations, weather monitoring, and equipment checks. Many services, like SummitGuides, even provide group gear such as ropes and safety equipment, reducing the load you need to carry.
For those seeking extra preparation, training partnerships with organizations like Uphill Athlete can provide tailored high-altitude training programs. Combining professional guidance with proper preparation gives you the best chance of a successful climb.
With the right fitness, gear, and expert support, Mont Blanc becomes an achievable goal. The journey will still test you, but you’ll be ready to face the mountain with confidence.
Climbing Mont Blanc safely requires careful planning, gradual acclimatization, and a solid understanding of the route options. Let’s break down the key aspects to help you prepare for this challenging yet rewarding adventure.
The Gouter Route is often considered the most straightforward option, thanks to its well-established hut systems. On the other hand, the Three Monts Traverse is a more technical route, better suited for seasoned climbers with advanced skills. However, even the Gouter Route has its challenges. The Grand Couloir, notorious for frequent rockfalls, and the exposed ridges along the way demand precise timing and strong climbing abilities.
Acclimatization is not something to rush. Gradual exposure to higher altitudes is essential to avoid altitude sickness and to give your body the time it needs to adjust. Mont Blanc’s weather can shift dramatically, even during the summer. A sunny morning can quickly give way to storms or freezing conditions, turning a manageable climb into a hazardous ordeal. Be ready for anything: pack gear for intense sunlight as well as sudden storms, and always listen to your body’s signals.
If you’re aiming to minimize risks, professional guidance can make all the difference. Certified guides bring invaluable expertise, from route selection to handling emergencies. For example, SummitGuides offers a 6-day Mont Blanc program starting at around €2,890. This package includes guide fees, accommodations, and group equipment - giving you the support and preparation needed to increase your chances of a safe and successful ascent.
Mont Blanc isn’t just a test of physical strength; it’s a challenge of mental resilience too. Proper training, reliable equipment, and expert advice are non-negotiable elements of your plan. Remember, the summit is only part of the journey - getting back down safely is what truly matters.
The Gouter Route is the most traveled path to the summit of Mont Blanc. Known for being less technically challenging, it features steep snow slopes and moderate rock scrambling. This makes it a suitable choice for climbers with basic mountaineering skills who are looking for a relatively straightforward ascent.
On the other hand, the Three Monts Traverse is a far more demanding route. It takes climbers across three peaks - Mont Blanc du Tacul, Mont Maudit, and Mont Blanc itself. This route calls for advanced mountaineering skills, technical know-how, and the ability to handle complex terrain. Steeper sections and crevasse risks add to the physical and technical challenges, making it a route better suited for experienced climbers.
Selecting the right route hinges on your climbing experience, fitness level, and how well you've acclimated to high-altitude conditions. Proper planning and expert guidance are key to ensuring a safe and rewarding climb.
To prepare for Mont Blanc and minimize the chances of altitude sickness, it’s crucial to let your body adjust gradually to the thinner air at higher elevations. Spending a few days at altitudes above 8,200 feet (2,500 meters) with planned ascents and rest periods can make a big difference in your readiness for the climb.
A popular approach involves staying two nights in mountain huts situated between 11,800 and 13,100 feet (3,600 to 4,000 meters) while engaging in gradual climbs to help your body adapt. Staying well-hydrated, steering clear of alcohol and sleeping pills, and closely monitoring how your body responds are essential steps to ensure your health and a successful climb.
For a safer and more enjoyable journey, you might want to team up with professionals like SummitGuides. Their certified experts specialize in crafting personalized and safe mountaineering experiences in the Alps.
To get ready for Mont Blanc, you'll need to focus on endurance, strength, and cardio training. Think activities like hiking with a weighted backpack, trail running, and strength-building moves such as squats, lunges, and step-ups. These exercises target the stamina and muscle groups you'll rely on during a high-altitude climb. Plan for at least six months of consistent training, including hikes that mimic mountain conditions with elevation gain and weight-bearing practice.
When it comes to gear, you'll need mountaineering boots, crampons, an ice axe, helmet, harness, and layered clothing designed for harsh weather. A lightweight backpack (35–45 liters) works well for carrying essentials like safety gear, extra layers, and water on summit day. Combining the right physical preparation with proper equipment is essential for tackling Mont Blanc safely and successfully.
If you're planning to climb Mont Blanc or the Matterhorn, acclimatization is your number one priority. These iconic peaks, standing at 4,810 m and 4,478 mt respectively, are breathtaking but physically demanding. Rapid altitude gains, thanks to cable cars and mountain huts, can increase the risk of altitude sickness - a serious condition that can escalate quickly. Here's what you need to focus on:
| Criteria | Mont Blanc | Matterhorn |
|---|---|---|
| Altitude | 4,810 m | 4,478 m |
| Terrain | Glaciated slopes | Steep rock faces, mixed snow |
| Acclimatization | Gradual altitude progression | Rapid elevation changes |
| Technical Skills | Basic mountaineering | Advanced techniques required |
| Climbing Time | ~10-12 hours | ~8-10 hours |
Preparation is key. Whether it's Mont Blanc’s icy slopes or the Matterhorn’s technical ridges, a well-planned acclimatization strategy, proper training, and mental readiness can make all the difference. Always prioritize safety and consult professional guides for a structured plan.
Preparing for high-altitude climbs like Mont Blanc and the Matterhorn requires a thoughtful approach to acclimatization. By giving your body time to adapt, you can reduce the risk of altitude sickness and improve your chances of a successful ascent. Below are some practical strategies to help you adjust effectively.
The "climb high, sleep low" approach is a widely recognized method to help your body adapt to high altitudes. It involves ascending to higher elevations during the day to encourage acclimatization, followed by descending to lower altitudes to rest and recover overnight.
Start your journey in Chamonix with at least two days dedicated to acclimatization. Gentle hikes, such as those along the Grand Balcon Nord/Sud or near Col du Balme, are excellent options to ease into the altitude.
A well-structured six-day itinerary might include a climb to Gran Paradiso (4,061 m / 13,324 ft) with two nights in mountain huts.
Before setting out, consult a doctor about medications like Acetazolamide (Diamox), which can help mitigate altitude sickness. Additionally, remedies such as crystallized ginger chews can ease mild symptoms and improve comfort during the climb.
These gradual ascent strategies are key to managing your energy, staying hydrated, and ensuring proper rest at altitude.
At high altitudes, your body faces increased energy demands, with daily expenditures ranging from 3,250 to 4,636 kilocalories. To meet these challenges, it’s essential to focus on hydration, nutrition, and rest.
Hydration: Staying hydrated is critical as the dry, high-altitude air accelerates fluid loss. For example, climbers on Mount Everest lose approximately 3.3 ± 0.6 liters of water daily due to increased breathing rates and low humidity. Monitor your hydration by checking the color of your urine - it should be a pale yellow.
Nutrition: Carbohydrates are your best friend in low-oxygen environments, as they provide an efficient energy source. As Ginés Viscor and colleagues explain:
"Maintaining energy balance during alpine expeditions is difficult for several reasons and requires a deep understanding of human physiology and the biological basis for altitude acclimation." - Ginés Viscor et al.
Rest: Incorporating rest days into your schedule is non-negotiable. These breaks allow your body to produce more red blood cells, helping it adapt to the reduced oxygen levels at higher altitudes.
Take advantage of the alpine infrastructure available in the region. Mountain huts, cable cars, and lifts can make a significant difference in your acclimatization process.
Cable Cars and Lifts: These tools allow you to reach higher altitudes with minimal physical strain, enabling you to focus on acclimatization without overexerting yourself in the early stages.
Mountain Huts: Staying overnight in mountain huts is an essential part of gradual adaptation. These huts offer meals and accommodations at altitude, providing a base for further climbs. Booking in advance is crucial, as availability can directly impact your acclimatization timeline.
Preparing for the rapid altitude gains of Mont Blanc and the Matterhorn goes beyond just acclimatization. The key to a successful climb lies in rigorous pre-climb preparation. Tackling these peaks demands a mix of physical strength, technical skills, and mental toughness.
Begin your training at least 16 weeks before your climb. The focus should be on building leg strength, core stability, and overall endurance. Include weight-bearing cardio exercises like trail running, hiking, or snowshoeing to mimic the conditions you'll encounter on the mountain. Adding interval training to your routine can improve your VO₂ max, helping your body use oxygen more efficiently.
For strength, incorporate exercises like jump squats, step-ups, and single-leg deadlifts to enhance power and balance. Combine these with upper-body moves such as side planks with overhead presses and push-ups paired with single-arm rows. Gradually increase the intensity by adding weight, like a loaded backpack, to simulate the demands of climbing.. Plan for day hikes that replicate the toughest parts of your ascent, matching pack weight, duration, and elevation gain.
This physical preparation is essential for handling the technical challenges of steep alpine terrain.
The technical requirements for Mont Blanc and the Matterhorn vary greatly. Mont Blanc typically involves basic mountaineering skills, such as walking in crampons, using an ice axe for self-arrest, and traveling as part of a rope team. These skills are often taught during guided climbs.
The Matterhorn, on the other hand, demands a higher level of technical expertise. You’ll need advanced proficiency with crampons, ice axes, and rope techniques, as well as experience with rock scrambling on exposed terrain. Practicing on similar terrain or taking a mountaineering course that combines skill-building with an actual summit attempt can be incredibly helpful. It’s also important to train for long, grueling days - 8 hours or more of continuous activity - to build the stamina necessary to minimize fatigue-related risks.
Pairing these technical skills with mental strategies will round out your preparation for high-altitude challenges.
Climbing at high altitudes is as much a mental challenge as it is a physical one. Practice controlled breathing techniques to manage anxiety, and use visualization exercises to build confidence. Positive self-talk can be a game-changer - simple mantras like "one step at a time" or "slow and steady wins the race" can keep you focused during tough moments. Breaking the climb into smaller, achievable goals, such as reaching the next rest stop, can make the journey feel more manageable.
Downtime is another factor to consider. Bringing along books, movies, or podcasts can help you unwind, while keeping a journal can provide an outlet to process your experiences. Strong communication and teamwork with your climbing partners also play a critical role in maintaining morale. Above all, believing in your ability to succeed is essential. As Henry Ford famously said, "Whether you think you can, or you think you can't, you're right".
Mont Blanc and the Matterhorn each present distinct altitude challenges, requiring climbers to adopt specific acclimatization strategies tailored to the nature of the terrain and the climb.
Mont Blanc, with its vast glaciated slopes, calls for a gradual approach to acclimatization. Spending several days at moderate altitudes helps climbers build stamina and adapt to the reduced oxygen levels encountered as they ascend.
On the other hand, the Matterhorn is a technical climb, combining steep rock faces with sections of snow. This requires climbers to be ready for sudden elevation changes and the physical intensity of navigating mixed terrain.
Recognizing these differences is essential for effective preparation.

When it comes to acclimatization in the Alps, professional guidance can make all the difference in ensuring safety and maximizing performance. SummitGuides, with over two decades of experience in the region, offers a streamlined approach through personalized plans led by highly qualified IFMGA/UIAGM certified guides.
SummitGuides creates programs designed to meet the unique challenges of each peak. For example, our 4-, 5-, and 6-day programs cater specifically to climbers tackling the Matterhorn and Mont Blanc. These plans are carefully crafted to simulate summit conditions while optimizing acclimatization.
For the Matterhorn, we include technical climbs on shorter, similar terrain to avoid overexertion during the critical adjustment period. For Mont Blanc, the programs incorporate glacier mountaineering, such as climbs on Aiguille du Tour, which mimic the conditions of the main ascent. Each course is tailored to your skill level, current mountain conditions, and weather patterns, ensuring a safe and effective progression.
SummitGuides also prioritizes individualized attention, maintaining a guide-to-climber ratio of 1:2 during acclimatization. To further bridge the gap between home training and high-altitude performance, we’ve partnered with Uphill Athlete to provide science-backed training plans and personalized coaching. This combination of tailored preparation and expert guidance sets climbers up for safe, well-paced ascents.
Acclimatization isn’t just about physical adaptation - it’s also about pacing and recognizing your limits. As SummitGuides explains:
"Maintaining a steady pace with gradual adjustments is key to controlling heart rate." – SummitGuides
This advice is especially critical for climbs like the Matterhorn, which can take 8–11 hours. In 2025, Doctor Rodrigo Belalcazar shared his experience:
Together with my family, we have traveled all over the world with guides from different companies, and we never imagined we could find a group of guides so highly qualified, kind, and always willing to give us the best experience of our lives." – Dr. Rodrigo Belalcazar
Climbing Mont Blanc (15,771 ft) and the Matterhorn (14,697 ft) is about much more than just being in good physical shape. The altitude alone presents serious challenges, requiring careful preparation and making acclimatization an absolute priority for anyone aiming to reach these iconic summits.
Preparation starts long before you set foot on the mountain. Months of uphill hiking, adopting healthy lifestyle habits, and honing technical climbing skills are essential. With dedication, these peaks are within reach for advanced beginner to intermediate climbers who approach the challenge with seriousness and a solid plan.
A patient and well-structured acclimatization process is non-negotiable. Your body needs time to adjust to the thin air, and rushing this step can jeopardize both safety and success.
Mental readiness is just as important. Summit days are long and demanding, so staying calm under pressure, maintaining focus, and knowing when to push forward - or turn back - are skills that come with practice and guidance.
Each mountain brings its own set of challenges. The Matterhorn’s steep rock climbing and exposed ridges require a different skill set and preparation than Mont Blanc’s glaciated slopes and unpredictable weather. Recognizing these differences and tailoring your approach to each mountain is critical. It’s this attention to detail that can turn a daunting climb into a rewarding and safe adventure.
Altitude sickness can bring on symptoms such as headache, nausea, dizziness, fatigue, difficulty sleeping, and loss of appetite. These issues tend to worsen as you climb to higher elevations and can escalate into serious health risks if ignored.
To reduce the risk of altitude sickness, focus on gradual acclimatization. Ascend slowly, take rest days, and give your body enough time to adapt to the thinner air. Staying hydrated, eating nutritious meals, and steering clear of alcohol can also make a big difference. If you notice symptoms, it's crucial to descend to a lower altitude right away. In more severe cases, treatments like supplemental oxygen or medications such as dexamethasone might be required. When tackling legendary peaks like Mont Blanc or the Matterhorn, always listen to your body and put safety first.
Preparing to tackle the challenges of climbing the Matterhorn and Mont Blanc demands a mix of physical preparation and mental toughness. A 6-month training plan is a great starting point. Incorporate cardio workouts to boost stamina, strength training to handle the physical strain, and technical skills like mastering crampons and navigating exposed, rugged terrain. The goal is to build the endurance and agility needed for the steep ascents and descents these climbs demand.
Acclimatization is equally important. Spend several days at mid-altitudes, progressively increasing your exposure by hiking, climbing, and even sleeping at higher elevations. This gradual approach helps your body adjust to thinner air, which is essential for handling the reduced oxygen levels you'll face on both peaks. On the mental side, work on staying calm and focused by training on similar terrain and mimicking high-altitude conditions whenever possible.
Ultimately, success on these mountains comes down to a combination of fitness, technical know-how, and proper acclimatization. Each element plays a critical role in ensuring a safe and rewarding climb.
Mountain huts and cable cars play a crucial role in preparing for high-altitude climbs like Mont Blanc and the Matterhorn. Cable cars give you quick access to higher altitudes, making acclimatization hikes less physically demanding. Once you've spent time at these elevations, descending to lower altitudes to rest can help your body adjust more effectively to the thinner air.
Mountain huts, on the other hand, provide essential shelter and a place to recharge during multi-day climbs. They also support the "climb high, sleep low" strategy, a proven method to lower the risk of altitude sickness. By incorporating these tools into your climbing plan, you can make the acclimatization process smoother and safer, giving yourself a better chance to tackle these legendary peaks.
Becoming an IFMGA-certified mountain guide is a challenging yet rewarding journey. This globally recognized certification qualifies guides to lead in mountaineering, rock climbing, ice climbing, and ski touring across 28 member countries. The process involves:
The process takes 3–6 years and costs $40,000–$60,000 on average. Once certified, guides gain access to global career opportunities in mountain guiding, training, and expedition leadership.
Read on for a detailed breakdown of requirements, training phases, and career options.
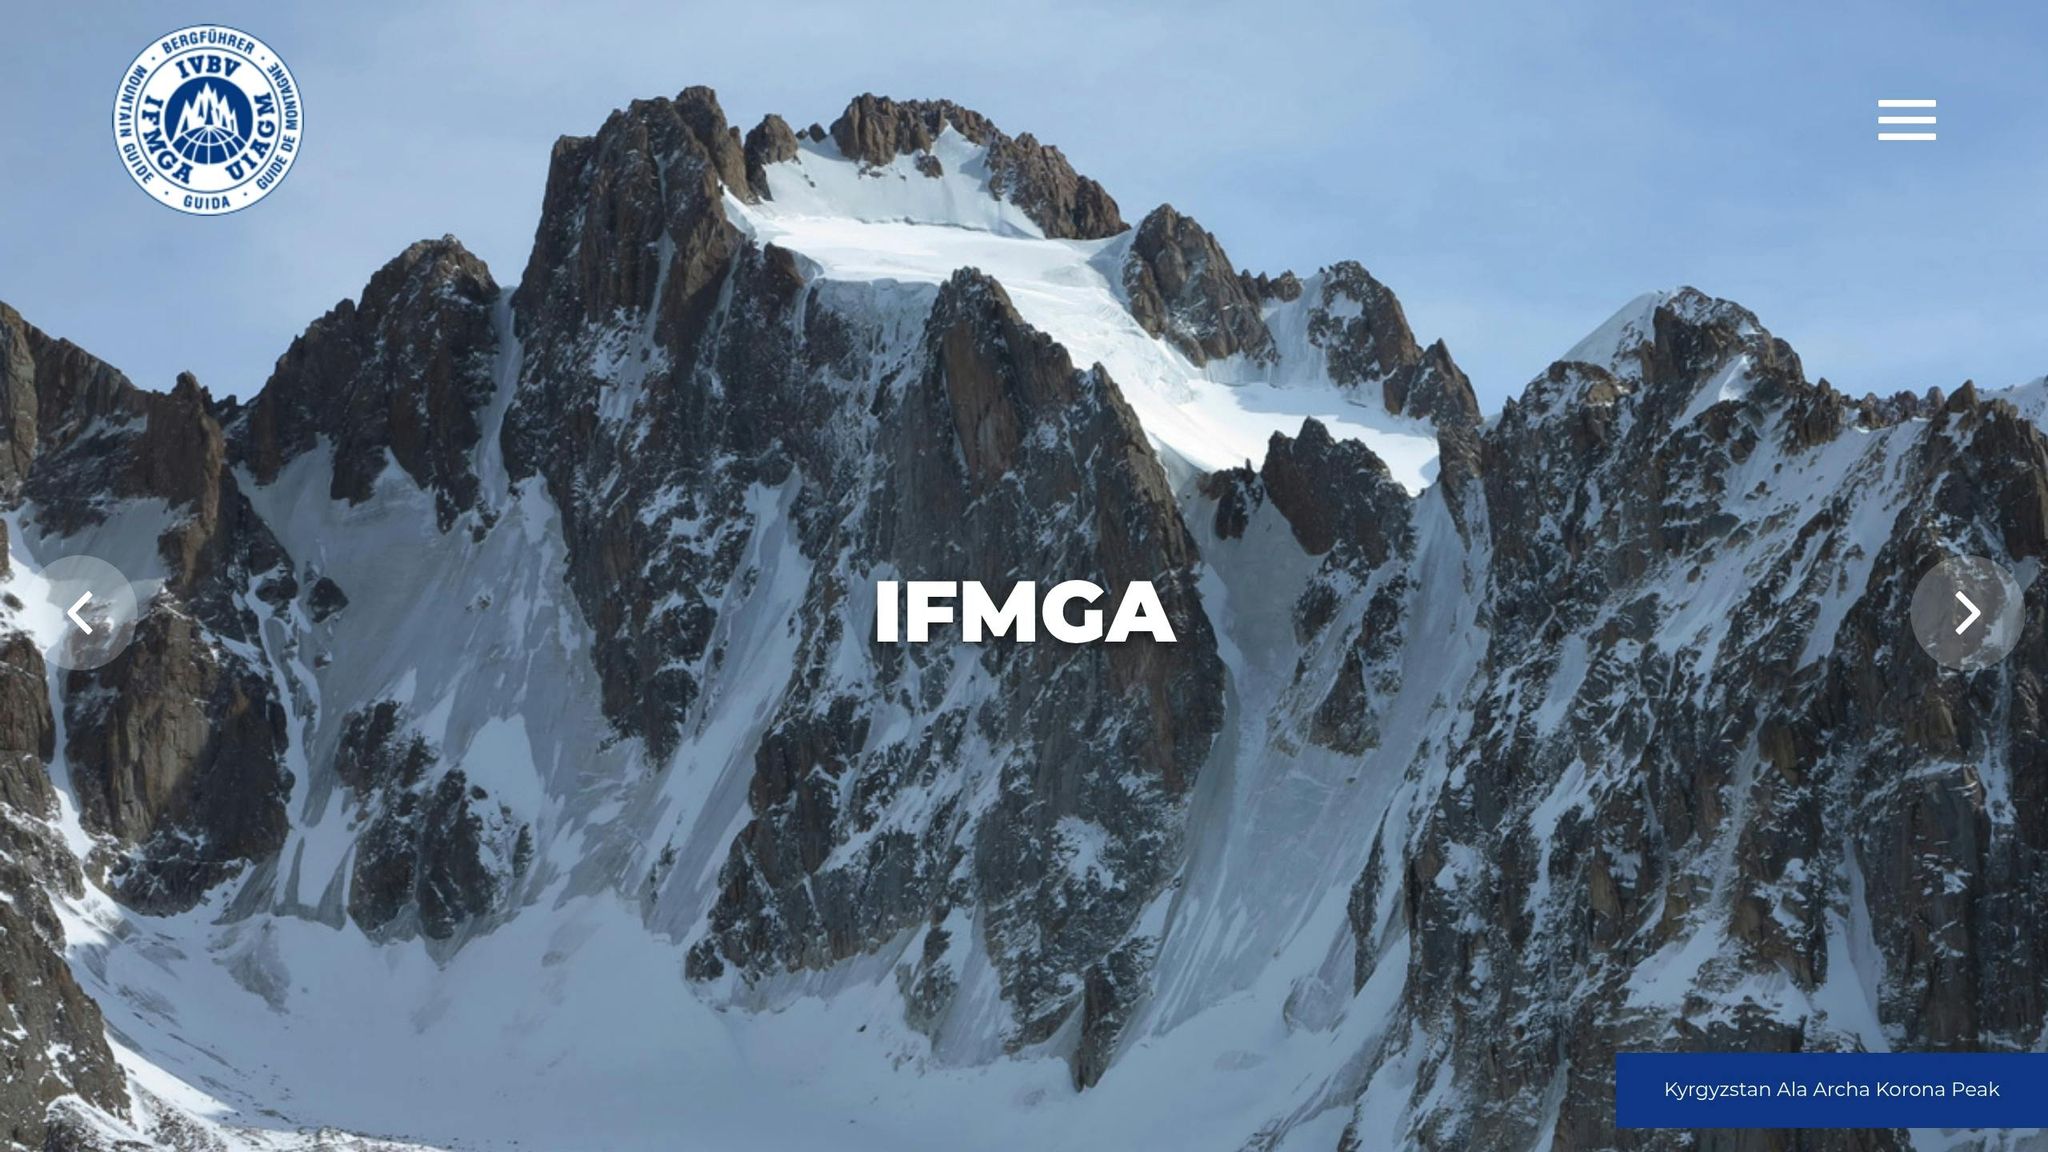
Starting your journey toward IFMGA certification means meeting specific baseline requirements that demonstrate your readiness. These prerequisites ensure you possess the essential skills and experience to tackle the demanding training ahead.
To qualify, you must document 55 varied routes over at least three years as a rope leader across different disciplines. Here's how the requirements break down:
You'll need to hold current CPR and Wilderness First Responder (WFR) certifications, along with advanced avalanche training. These certifications are essential for navigating the remote and often hazardous environments you'll encounter:
These qualifications are critical for ensuring safety in situations where professional medical assistance isn't immediately available.
The IFMGA training program spans at least 94 days and typically takes between 3 to 6 years to complete. It blends theoretical knowledge with hands-on practice across various mountain disciplines, guiding participants step-by-step toward full certification.
Your journey begins with the Aspirant Guide Course, which lays the foundation for all future training. This initial phase involves 66 days of group training, covering essential skills across multiple mountain disciplines. The course is divided into specific modules designed to build critical competencies:
| Training Module | Duration (Days) |
|---|---|
| Snow and avalanche evaluation | 6 |
| Theoretical basics | 3 |
| Trekking and expeditions (high-altitude medicine, group guiding, remote areas) | 3 |
| Self-rescue and organized mountain rescue | 4 |
| First Aid | 2 |
| Practical winter training (skiing, ski mountaineering, mechanized skiing) | 16 |
| Summer training (rock, ice, mixed terrain, glacier travel) | 16 |
| Alpine rock climbing, sport climbing, indoor climbing, via ferrata guiding | 7 |
| Assessment of practical and theoretical skills | 6 |
| Training at Member Association's discretion | 3 |
After completing the 66-day group training, you achieve Aspirant Guide status. This is followed by 14 days of supervised practical learning - 7 days in summer mountaineering and 7 days in winter/ski conditions - conducted under the guidance of two IFMGA trainers. Once this phase is complete, the program shifts focus to three specialized disciplines to further develop your guiding expertise.
The heart of the IFMGA training program centers on three key disciplines, each with dedicated time and skill requirements:
In addition to technical skills, the IFMGA certification places a strong emphasis on leadership and client management. Training in this area focuses on coaching and communication techniques to effectively guide clients with diverse skill levels. You'll learn how to offer constructive feedback, motivate clients, and manage the logistics of complex, multi-day expeditions.
Decision-making skills are also a key focus. You'll practice assessing weather, terrain, and client capabilities to ensure clear communication of risks. Interpersonal skills, such as managing group dynamics, resolving conflicts, and working with international clientele, are integral to this training. Additionally, you'll gain experience in essential business practices like client briefings and route documentation, preparing you for the rigorous testing and final certification process.
Source: IFMGA guidelines
After completing the extensive training modules, your final step toward earning the IFMGA certification is a rigorous assessment. This process evaluates not only your technical expertise but also your ability to lead clients safely in challenging mountain environments.
The IFMGA certification process involves a series of tests designed to assess your guiding, technical, and climbing abilities. It begins with an entry exam covering essential skills like rock climbing, ice climbing, skiing, and general mountain techniques. From there, candidates proceed through practical training, a comprehensive mountain guide course, and a final evaluation. These assessments focus on both technical mastery and interpersonal skills, ensuring you're fully prepared to guide others in the mountains.
"The guide's training programme is not designed to transform you into a skier or a mountaineer or a climber. It is designed to take all-around mountain climbers and skiers and give them the tools and training to lead novice or competent climbers or skiers into the mountains." – East European Mountain Guides Association
The practical portion of the assessment spans at least 84 days and includes supervised learning in real mountain conditions. In the United States, the American Mountain Guides Association (AMGA) oversees certification courses and exams for Rock Instructor, Rock Guide, Alpine Guide, and Ski Guide certifications. While the programs are open to all qualified candidates, a strong command of English is highly recommended for effective participation.
Completing these assessments requires a significant investment of both time and money.
Earning your IFMGA certification is a long-term commitment. The entire process typically takes about five years, with a timeline ranging from three to six years depending on course availability and personal progress. Scheduling can also be a challenge, as some courses and exams are only offered once per year.
The financial aspect is equally demanding. For those pursuing certification through the AMGA, tuition and fees average $26,700, with total costs - including travel, lodging, and training time - reaching approximately $50,000. Individual courses range from $2,200 to $3,500, while the full pathway costs around $30,000.
However, financial aid is available. The AMGA provides over $45,000 annually in scholarships, benefiting about 8% of its students. Alternatively, completing the IFMGA program through the Association of Canadian Mountain Guides (ACMG) costs approximately $35,000 CAD.
Achieving certification is just the beginning. To remain certified, guides must participate in ongoing professional development. This includes continuous education and regular skill assessments to stay updated on the latest safety protocols, rescue techniques, and environmental practices. Workshops, courses in avalanche forecasting, and high-altitude medicine are just a few examples of the ongoing training required to maintain certification.
This certification not only opens doors to global opportunities but also ensures guides lead with professionalism and expertise.
"The IFMGA trains, coaches and instructs guides in the four main disciplines of mountaineering, rock climbing, ice climbing and ski touring." – Expedreview.com
Earning an IFMGA certification opens doors to a variety of high-level mountain guiding careers. This credential is recognized globally, providing access to professional opportunities across different disciplines and regions.
An IFMGA certification is your passport to guiding work around the world. The International Federation of Mountain Guides Associations has established agreements that allow certified guides to work internationally while adhering to consistent safety and competency standards. These agreements simplify the process of obtaining permits and communicating with clients during trips abroad.
"IFMGA certification allows qualified guides to work internationally through mutual recognition agreements. This creates professional mobility while maintaining high standards of competence and safety in different mountain regions." – IFMGA Official
In Europe, this certification is a must for professional guiding, particularly in regions like the Alps and Pyrenees. Meanwhile, in the United States, over 200 guides hold IFMGA certification, reflecting its growing importance as a global standard. Many successful guiding businesses rely on IFMGA-certified professionals, emphasizing the value of this credential in building trust with clients and ensuring safety.
With the global recognition of IFMGA certification, guides can explore a wide range of specialized roles. Certified guides are trained in areas like geography, weather analysis, climbing techniques, navigation, and survival skills, making them well-suited for various mountain-based careers. Day-to-day responsibilities often include planning routes, risk assessment, operating specialized equipment, performing rescues, and teaching survival techniques in diverse environments - from scenic trails to icy summits.
One standout role is Expedition Leadership, where guides lead clients on major climbs and multi-day adventures. This position combines technical expertise with motivational leadership, all while enforcing strict safety measures.
Another rewarding path is Training and Education, where guides teach workshops on skills ranging from basic mountaineering to advanced rescue techniques. This work often involves a mix of classroom instruction and hands-on field training, allowing guides to pass their knowledge on to aspiring adventurers.
For those seeking independence, starting your own guiding business is an option, offering the flexibility to craft personalized mountain experiences. Alternatively, Corporate Partnerships with established adventure companies provide stable employment, complete with benefits, consistent work schedules, and opportunities for growth.
SummitGuides is a great example of a top-tier guiding company that actively recruits IFMGA-certified professionals. With over 20 years of experience in the Alps, our company specializes in mountaineering, ski touring, trekking, and alpine climbing, employing only IFMGA/UIAGM-certified guides.
SummitGuides illustrates how IFMGA certification translates into real-world opportunities. We offer tailored experiences centered on safety, adventure, and environmental responsibility - principles that align perfectly with the training IFMGA guides receive. Their programs range from beginner-friendly ski tours starting at €1,540 for six days to advanced climbs like the Matterhorn.
For newly certified guides, working with SummitGuides provides invaluable mentorship, exposure to an international clientele, and the chance to refine skills in some of the world’s most famous mountain ranges. Partnerships with organizations like Uphill Athlete for training and Global Rescue for safety highlight the extensive professional network that comes with an IFMGA certification.
These opportunities showcase how an IFMGA certification can serve as the foundation for a dynamic and fulfilling guiding career.
Pursuing certification as an IFMGA mountain guide is no small feat - it’s a career path that demands unwavering commitment, significant financial resources, and years of honing your skills in the mountains. But the reward? Global recognition and a world of opportunities in guiding.
To start, you’ll need a solid foundation of experience in both climbing and skiing. Keep in mind that certification requirements can vary depending on where you’re based, but the general process involves years of rigorous training and preparation.
The training itself is intense, spanning a minimum of 94 days over a period of 3 to 6 years. For those in the United States, the American Mountain Guide Certification offered by the AMGA is a key step. This program, recognized in over 20 IFMGA member countries, includes at least 86 training days and emphasizes not just technical expertise but also critical soft skills like leadership, risk management, and effective communication.
The financial commitment is substantial. Kel Rossiter, a respected mountain guide, breaks it down:
"There are about 100 instructional days total and success with the three exams means that for each instructional day, you're probably devoting ten more days of practice. The whole process costs from $40,000–$60,000. It's the PhD equivalent of guiding, every bit as demanding and rigorous."
On average, professional guides have logged close to a thousand days in the field over nine years of work before earning their certification. This highlights the level of experience and dedication required to reach this milestone.
Mentorship is another critical element of the journey. Learning directly from seasoned professionals offers insights that go beyond formal training. Observing how experienced guides handle real-world scenarios can be invaluable as you prepare for certification and develop your own guiding style.
Once certified, the doors to global opportunities swing open. Companies like SummitGuides actively seek IFMGA-certified guides to lead alpine adventures. With 95% of clients rating the value of guided experiences as high, certified guides are well-positioned to build fulfilling careers while ensuring their clients enjoy safe and unforgettable experiences in the mountains.
As IFMGA-certified guide Jayson Simon-Jones puts it:
"The IFMGA is the pinnacle, the highest level of training you can get if you hire a guide".
This certification is not just a badge - it’s a testament to years of hard work, skill, and passion for the mountains.
Becoming an IFMGA-certified mountain guide is no small feat - it’s a demanding path that calls for unwavering dedication, advanced skills, and plenty of perseverance. On average, the journey spans 2 to 4 years and involves intense training paired with challenging exams in areas like alpine climbing, rock climbing, and ski guiding. The combination of physical demands, technical mastery, and the significant time investment often proves to be the toughest part for many.
For those aiming to succeed, it’s crucial to gain broad experience across various mountain environments, complete the required courses, and log the necessary work hours. Spending time practicing in different terrains and weather conditions will build the confidence and adaptability needed for the rigorous assessments. Staying disciplined and committed to learning every step of the way is essential for tackling this challenging certification process.
Earning an IFMGA certification opens up a world of opportunities for mountain guides, allowing them to work internationally without the hassle of obtaining extra licenses. This globally recognized credential makes it much simpler to guide in diverse settings, from alpine landscapes to rock climbing routes and ski touring areas.
On top of that, IFMGA-certified guides often command higher daily rates, typically ranging from $300 to $350. Beyond the financial perks, the certification boosts professional reputation and job flexibility, offering access to elite guiding positions and a wider range of clients. For those aiming to take their outdoor guiding careers to the next level, this certification is a game-changer.
Yes, there are ways to get financial help for those working toward IFMGA certification. Organizations like the American Mountain Guides Association (AMGA) offer scholarships and grants to support aspiring guides. That said, financial aid options in the U.S. can be somewhat limited, so it’s wise to budget for potential personal expenses.
If you’re interested in applying, start by visiting the websites of organizations that provide scholarships. Carefully review their eligibility requirements, and make sure to submit a complete application. This often involves gathering documents like proof of enrollment in guiding courses or writing a personal statement, which can boost your chances of receiving funding.
The Matterhorn is one of the most iconic and challenging peaks in the Alps, standing at 14,692 feet. Climbing the Hörnli Ridge, its most accessible route, is no walk in the park. This climb requires months of preparation, technical skills, and physical fitness to handle its exposed terrain, unpredictable weather, and demanding ascent. Here’s what you need to know:
Professional Guides: Hiring experienced, certified guides increases safety and success rates (75–80%). They manage navigation, rope systems, and real-time risk assessment.
Preparation is everything. From fitness to gear and expert guidance, every detail matters for a safe and successful climb.
The Hörnli Ridge (Hörnligrat) is the most well-known and accessible route to the Matterhorn's summit. But don’t be fooled by its reputation as the "easiest" path - this climb is anything but simple. First conquered by Edward Whymper and his team in 1865, the Hörnli Ridge has tested climbers' skills and determination for over 150 years.
The Hörnli Ridge is a relentless scramble with technical sections scattered throughout, climbing approximately 4,265 feet (1,300 meters) from the Hörnli Hut to the summit. The route is rated 'Assez Difficile' (AD), with sections graded as UIAA III, which translates to British Difficult/Very Difficult levels.
The terrain is a mix of rock, snow, and ice, requiring climbers to use crampons on rocky surfaces at times - a skill that demands precision and experience. Over the years, the heavy traffic on this route has cleared much of the loose rock that once added to the danger. Modern additions like bolts, fixed ropes, and metal stanchions in exposed areas provide extra safety, but the climb still demands sharp focus and careful foot placement.
"Climb if you will, but remember that courage and strength are nought without prudence, and that a momentary negligence may destroy the happiness of a lifetime. Do nothing in haste; look well to each step; and from the beginning think what may be the end."
– Edward Whymper
The climb involves extended roped scrambling that tests both endurance and technique. And while the physical demands are significant, the environmental challenges are just as daunting.
The Hörnli Ridge is not just physically demanding - it’s also fraught with environmental risks. Rockfall is a constant threat, particularly if climbers stray from the established route. Although years of climbing have reduced the amount of loose rock, vigilance is always necessary.
At an altitude of roughly 14,692 feet, the weather can shift dramatically. Climbers may start with clear skies and find themselves in a sudden whiteout, making route-finding especially tricky in the pre-dawn hours. The ridge’s exposure means that being sure-footed and confident on steep, challenging terrain is non-negotiable.
The descent, often overlooked in preparation, presents its own set of difficulties. Fatigue can lead to mistakes during downclimbing and many accidents occur when climbers relax their focus after reaching the summit.
Climbing the Hörnli Ridge typically takes 4–5 hours for the ascent and the same amount for the descent, totaling 8–10 hours. Pacing is critical - moving too slowly increases the chance of being caught in deteriorating afternoon weather, while rushing can lead to errors. The Swiss Alpine Club reports that 1 in every 415 climbers dies on the Matterhorn, emphasizing the importance of maintaining steady, deliberate progress.
Most climbers begin their ascent at 3:30–4:00 AM to stay ahead of the afternoon weather. A helpful tip is to scout the first 1,000 feet (300 meters) of the route the day before attempting the summit. This allows you to familiarize yourself with the terrain and identify the best path. The climb requires a marathon-like rhythm - balancing energy conservation with focus is essential for a safe and successful descent.
Climbing the Matterhorn is no easy feat - it demands top-notch physical fitness and proper preparation for high-altitude conditions. To tackle this iconic peak, you'll need to focus on building endurance, strength, and stability while also preparing your body to handle the challenges of reduced oxygen levels.
Taking on the Matterhorn requires a level of fitness that goes far beyond your average hike. To put it in perspective, the climb involves at least twice the terrain you'd encounter on a standard Grand Teton ascent. Your training should target three main areas: aerobic endurance, leg strength, and core stability, all of which will help you maintain a steady pace on exposed and demanding terrain for 8 to 10 hours straight.
Endurance is the cornerstone of mountaineering fitness. Start training about 16 weeks before your climb, gradually ramping up intensity while incorporating rest days to avoid overtraining. Activities like trail running, hiking, and snowshoeing are excellent for building both cardiovascular strength and leg power. To prepare for the thinner air at higher elevations, include interval training to improve your body's ability to use oxygen efficiently. Simulating the climb by doing day hikes with a pack that matches the expected weight, elevation gain, and duration of your ascent is also key.
Don't overlook core strength and balance. These are critical for navigating scrambling sections and using crampons on rocky terrain. Aim to peak your training about two weeks before the climb, then taper off during the final week to ensure you're well-rested and ready for the challenge. With your fitness base firmly established, it's time to focus on adapting to high altitudes.
Once you've built your physical foundation, acclimatization becomes the next priority. This process allows your body to adjust to the reduced oxygen levels at higher altitudes. Rushing the ascent is a common mistake and a major cause of altitude sickness.
To put it into perspective, it takes roughly 11.4 days for full hematological adaptation for every 3,300 feet of elevation gain. At the Matterhorn's 14,692-foot summit, the risk of altitude-related issues is very real, with 75% of people experiencing mild symptoms of Acute Mountain Sickness (AMS) above 10,000 feet.
"The best way to acclimatize is to do it naturally, by going slow and steady." - Garrett Madison, Everest Guide
A gradual ascent is your best bet. Avoid jumping from low elevations to over 9,000 feet in a single day. Once you're above 9,000 feet, limit your sleeping elevation gains to no more than 1,600 feet per day and include an extra acclimatization day every 3,300 feet. Another proven method is the "climb high, sleep low" approach - spend your days at higher elevations but return to lower altitudes to sleep.
"Be conservative in going higher. Climbers get into trouble when they push too hard too fast." - Garrett Madison, Everest Guide
If possible, pre-acclimatize by spending time at altitudes between 8,000 and 14,000 feet during the six to two weeks leading up to your climb. This could involve climbing other high peaks or staying at high-altitude destinations. For example, Colorado ski resorts often see 25–30% of sea-level visitors experience AMS at elevations of around 9,000 feet.
Staying hydrated is also crucial - aim to drink 2–4 liters of water daily and steer clear of alcohol or intense physical activity when you first arrive at altitude.
Climbing the Matterhorn, with its towering 14,692-foot peak, requires advanced mountaineering expertise. The route, rated 5.4/Grade 3, primarily involves rock climbing with some sections of snow and ice. Success depends on mastering movement over mixed terrain and efficient rope handling. These skills are not just helpful - they’re essential for safely navigating the mountain’s exposed and varied landscape.
Navigating the Matterhorn demands proficiency in several key areas:
"Good basic movement skills on exposed (not necessarily difficult) rock with crampons on cannot be overemphasized." - Filippo Livorno - SummitGuides
To prepare for these challenges, practice these skills in controlled environments before attempting more demanding alpine routes.
Targeted training climbs are invaluable for building the skills needed for the Matterhorn. Locations like the North Cascades, Tetons, or Sierras offer diverse terrain that mimics the challenges of the Matterhorn, including glaciers, steep rock, and exposed ridges.
For those planning to climb in the Alps, our 6-day Matterhorn course offers the ideal preparation. Designed and led by IFMGA-certified guides, the course blends technical training with real alpine experience - covering mixed climbing, glacier travel, and ridge movement. You'll tackle routes like the Aiguille d’Entreves and climb acclimatization peaks to build fitness, confidence, and skills progressively.
Rather than piecing together training routes on your own, this program provides a structured path toward the Matterhorn, with expert guidance every step of the way. It’s more than a course - it’s a complete preparation journey.
When it comes to climbing the Matterhorn, having the right gear can mean the difference between reaching the summit and turning back. You'll need equipment that can handle everything from technical rock climbing to icy terrain, all while keeping your pack light for a demanding summit push.
Mountaineering Boots
Your boots are the cornerstone of your gear. Opt for summer alpine boots designed specifically for mountaineering, as they need to securely fit crampons. Avoid anything labeled for "trekking" or "trail walking." Lightweight, stiff boots like the Mammut Tais Light GTX, Scarpa Ribelle Tech, Charmoz, or La Sportiva Trango Cube GTX are excellent for the Matterhorn’s mix of scrambling and rock climbing. Their stiff soles allow you to use small footholds effectively and ensure proper crampon compatibility. Break them in thoroughly before your climb to avoid blisters.
Crampons
Choose 12-point crampons with anti-balling plates that can handle mixed rock, ice, and snow. Steer clear of lightweight walking crampons or overly heavy models. Ensure they fit your boots snugly and perform well across varied terrain.
Ice Axe
A basic mountaineering ice axe with a simple, strap-free design is ideal. Straps or leashes can snag on rocks, so removing them helps you move more efficiently. The ice axe will primarily serve as a safety tool for snow sections (when the Matterhorn is completely dry, you won’t even need it).
Harness and Helmet
Go for a general mountaineering harness that balances comfort and versatility. If you prefer a rock climbing harness, make sure it fits comfortably over multiple clothing layers. Pair it with a mountaineering helmet designed to protect against falling rocks.
Clothing System
Layering is your best defense against the unpredictable alpine weather. Your outer shell - both jacket and pants - should be made of Gore‑Tex or another waterproof, breathable material. For colder conditions, pack a down jacket with a fill power of 700‑750. This system lets you adapt to everything from sunny rock climbs to windy, snowy summit conditions.
Other Gear
A 30–35 liter rucksack is typically sufficient to carry your essentials, and a durable 1‑liter water bottle works well in cold weather.
Once your gear is sorted, the next step is packing efficiently.
To tackle the Matterhorn’s roughly 3,937 feet (1,200 m) of technical ascent, keeping your pack light is crucial. Here are some ways to streamline your load without sacrificing safety or functionality:
Every item in your pack should have a clear purpose. Test your gear on training climbs to fine-tune your setup and ensure you're ready for the Matterhorn’s unique challenges.
The Matterhorn is infamous for being one of the world's most perilous peaks. With over 500 recorded fatalities and about 3,000 climbers reaching its summit each year, understanding and managing risks is critical for a successful and safe climb.
While technical skills and the right gear are essential, knowing how to handle the mountain's inherent dangers is the final, crucial piece of preparation.
The Matterhorn poses a variety of hazards that can quickly turn a climb into a life-threatening ordeal. One of the biggest dangers is rockfall, which becomes particularly risky when climbers deviate from established routes. Pablo M. Iturrieta, an experienced mountaineer, highlights this risk:
"The Matterhorn is a very dangerous mountain, one of the deadliest in the world... The rock is very, very, loose if you get off track. No one should attempt this mountain unless you are trained and technically prepared."
Descending the mountain is always more challenging than the ascent. Exhaustion and fading daylight often make route finding harder. As mountaineer Torben Retboll notes, "Climbing down is often more demanding than climbing up."
Weather on the Matterhorn is another unpredictable factor. What starts as a clear morning can quickly turn into a storm, increasing the likelihood of avalanches and rockfalls. Additionally, altitude sickness is a real threat at the peak's towering height of 14,692 feet (4,478 meters).
Other contributing factors to accidents include overestimating one's abilities, insufficient fitness, and a lack of familiarity with the local terrain. To succeed, climbers must be adept at altitude awareness, precise route navigation, climbing steep snow and ice, rock climbing in mountaineering boots, rappelling, and managing belay systems - all while battling fatigue and rapidly changing conditions.
Given the mountain's risks, having professional guidance can be the difference between a safe climb and a dangerous misstep.
Expert guidance can significantly reduce the risks associated with climbing the Matterhorn. Professional mountain guides bring years - often decades - of experience and local knowledge, which can mean the difference between a successful summit and becoming part of the grim statistics. According to the Zermatt Alpine Center, guided climbers have a 70–80% success rate of reaching the summit.
IFMGA/UIAGM-certified guides, such as those from SummitGuides, offer an unmatched level of expertise. With over 20 years of experience navigating the Alps, our guides understand the mountain's weather patterns, seasonal shifts, and potential hazards. Their certification represents the highest international standard in mountain guiding, ensuring they are skilled in technical rescue, hazard evaluation, and emergency response.
One of the most critical services guides provide is hazard assessment and mitigation. British UIAGM guide James Thacker underscores the evolving nature of risks on the Matterhorn:
"Gone are the days of the romantic notion that 'chutes de pierres' [rockfalls] are part of alpinism. We are now looking at rockfalls and collapses of a different scale."
This changing risk landscape demands constant vigilance and adaptability. Jan Beutel, a mountain guide and natural hazard researcher at the University of Innsbruck, explains:
"As guides, we have a long tradition of best practices both in alpine know-how as well as in hazard assessment and mitigation. There has always been change and adaptation, only now the speed necessary is beyond comprehension."
Guides play a critical role in making real-time decisions as conditions evolve. They assess whether to continue or retreat based on weather, forecasts, and the client’s capabilities. Their ability to make tough calls - such as turning back when safety margins become too narrow - can save lives.
Additionally, professional guides efficiently manage rope systems, establish secure belays, and respond to emergencies with practiced skill. They know exactly where and how to set up protection, minimizing risks at every step.
When choosing a guide, it’s essential to rely on local IFMGA/UIAGM-certified offices for accurate advice and support. Casual reports like "It was fine!" can be misleading.
SummitGuides' certified professionals offer personalized preparation, addressing both the technical demands and mental resilience needed to tackle the Matterhorn. Our focus on safety and responsible climbing ensures that your ascent is not only a personal triumph but also a respectful interaction with this iconic peak, complementing your own diligent preparation.
Climbing the Matterhorn is no small feat - it demands thorough preparation and a commitment to safety. This legendary peak's challenges require a thoughtful approach, combining physical training, technical skills, and careful planning.
As Edward Whymper wisely put it:
"Climb if you will, but remember that courage and strength are nought without prudence, and that a momentary negligence may destroy the happiness of a lifetime. Do nothing in haste; look well to each step; and from the beginning think what may be the end."
Reaching the summit means mastering a variety of skills that go far beyond basic rock climbing. You'll need to handle extended periods of roped scrambling, maintain balance on exposed ridges and navigate mixed terrain with confidence. Technical rope work is equally critical, as is the ability to adapt to the mountain's unpredictable conditions.
Acclimatization is another key factor. Spending time on high-altitude peaks and gradually adjusting to thinner air can make all the difference. This preparation helps your body adapt to reduced oxygen levels, ensuring you're ready for the physical demands of the climb.
Route-finding skills are essential for staying on course and avoiding loose or hazardous sections of rock. Because the weather can shift rapidly, moving efficiently is crucial. While you'll want to pack light, it's equally important to bring gear that can handle a wide range of temperatures.
For many climbers, hiring a professional guide increases both safety and the likelihood of success. SummitGuides' IFMGA/UIAGM-certified professionals, with over 20 years of Alpine experience, offer invaluable expertise. Our guided programs provide detailed acclimatization plans, expert navigation, and real-time risk management. Our local knowledge is an asset in tackling the mountain's ever-changing conditions.
Whether you choose to climb independently or with professional support, the key to success lies in preparation, teamwork, and respect for the mountain. The Matterhorn rewards those who approach it with care, skill and the humility to turn back if conditions demand. Every step on this iconic peak is a testament to your training and perseverance - make each one count.
Preparing for the Matterhorn Hörnli Ridge demands a mix of endurance, strength, and climbing-specific skills. To build cardiovascular fitness, focus on activities like trail running, hiking, or stair climbing. These exercises help develop the stamina needed for long, grueling days on the mountain. For added realism, train with a loaded pack to mimic the conditions you'll face during the climb.
Strength training is just as important. Include movements like squats, lunges, calf raises, and core exercises to strengthen the muscles you’ll rely on most during mountaineering. To sharpen your climbing technique and build upper body strength, practice regularly - whether at an indoor climbing gym or on outdoor rock.
Consistency matters. Train multiple times a week, gradually increasing the intensity and duration of your sessions. Aim to sustain steady movement for over six hours while carrying weight, as this reflects the physical demands of the traverse. If you’re unsure how to create a training plan, reaching out to a professional guide or trainer can provide tailored guidance to get you mountain-ready.
Before tackling the heights of the Matterhorn, taking steps to reduce the risk of altitude sickness is essential. The best approach? Acclimate slowly. Spend 2–3 nights at elevations of 8,000 to 9,000 feet to give your body the time it needs to adjust. During this period, make sure to stay hydrated, skip alcohol, and include rest days in your schedule - these habits can make a big difference.
For added preparation, you might explore options like hypoxic training or planning staged ascents in the weeks leading up to your climb. These techniques can help your body adapt to thinner air, making your time at higher altitudes more comfortable and safer.
To take on the Hörnli Ridge safely, you’ll need solid high-altitude mountaineering skills paired with rock climbing experience up to a 5.7 grade. Comfort with crampons and an ice axe is essential. You should also know how to navigate challenging steep snow and icy terrain. Having prior experience in similar alpine environments will boost both your confidence and your safety.
Understanding the distinctions between IFMGA and AMGA certifications is essential for anyone pursuing a career in mountain guiding or seeking guided adventures. Here's the quick breakdown:
| Attribute | IFMGA Certification | AMGA Certification |
|---|---|---|
| Global Recognition | Required for guiding in Europe; global | Primarily recognized in the U.S. |
| Training Scope | Covers rock, alpine, and ski guiding | Specialization in one or more areas |
| Time Commitment | ~4 years | Flexible |
| Cost | $20,000+ | Varies, but similar for full training |
| Work Opportunities | International | Primarily domestic |
For guiding in Europe or internationally, IFMGA is often mandatory. In the U.S., AMGA certification aligns with domestic needs and offers flexibility. Your choice depends on career goals and where you plan to guide.

Both the IFMGA and AMGA certifications are cornerstones of professional mountain guiding. While IFMGA establishes global standards, AMGA tailors these benchmarks to the U.S., ensuring guides receive training that meets international expectations. Let’s break down each organization’s role and mission.
The International Federation of Mountain Guides Associations (IFMGA) serves as the global authority for mountain guide certification, representing nearly 6,000 guides across more than 20 member countries. It provides a unified framework to ensure consistency and safety in mountain guiding worldwide.
"The IFMGA is the international governing body responsible for guiding standards and education around the world."
The IFMGA's mission revolves around regulating the profession on a global scale. It works closely with governments to establish standardized laws, training protocols, and regulations. To earn certification, guides must demonstrate expertise in three key disciplines: rock guiding, alpine guiding, and ski guiding. This ensures they are prepared to navigate diverse terrains and conditions safely. By harmonizing international practices, IFMGA certification allows guides to work legally across multiple countries while adhering to consistent safety standards.
The American Mountain Guides Association (AMGA) brings the IFMGA's global standards to the U.S., adapting them to meet the specific needs of American guides. While the IFMGA focuses on regulation, AMGA emphasizes hands-on training, helping guides refine their skills and apply effective techniques in real-world scenarios.
The AMGA’s mission includes training guides, promoting professional standards, and supporting its members in delivering top-tier climbing and skiing experiences. It also advocates for access to public lands, risk management, and the responsible stewardship of natural resources. By fostering a diverse guiding community, AMGA helps its members build long-term, sustainable careers.
Unlike the IFMGA’s requirement for certification across all three disciplines, AMGA allows guides to specialize in one - rock, alpine, or ski guiding. However, guides aiming for full IFMGA recognition must complete training in all three areas through AMGA programs. Additionally, AMGA maintains a strong network of accredited business partners and enforces strict standards, including a Scope of Practice, Code of Conduct, and Ethics guidelines, to support guides in achieving excellence.
This foundational understanding sets the stage for a deeper dive into the certification pathways and training processes offered by each organization.
This section dives into the specific pathways and training requirements for IFMGA and AMGA, shedding light on their distinct approaches and helping aspiring guides determine which route aligns with their career aspirations.
The IFMGA certification process is a structured, step-by-step journey that requires proficiency across all three mountain guiding disciplines. To get started, candidates must meet stringent entry requirements. These include being an adult, having documented experience in mountaineering, skiing, rock climbing, and ice climbing, and providing proof of at least 55 routes climbed over a minimum of three years. The process kicks off with an entry exam that tests multiple skills, such as rock climbing (with both mountaineering boots and rock shoes), ice climbing, skiing and general mountain navigation. This ensures candidates have a solid foundation before moving forward.
Once the entry exam is cleared, candidates proceed to the Aspirant Guide Course, which spans at least 66 days of intensive training. This phase covers critical topics like snow and avalanche safety, theoretical principles, expedition planning, self-rescue techniques, first aid and hands-on practice in both winter and summer alpine conditions. The course combines classroom instruction with fieldwork and concludes with a thorough skills assessment.
Following this, candidates engage in supervised practical learning, which includes 14 days of mentorship under two IFMGA trainers, focusing on both summer and winter disciplines. The final stage is the 14-day Mountain Guide Course, where candidates refine their skills in summer and winter mountaineering, including ski mountaineering. Successfully passing a comprehensive exam at this stage earns candidates the prestigious IFMGA Mountain Guide Diploma.
The AMGA certification pathway stands out for its flexibility, offering a modular structure that allows guides to specialize in specific disciplines while still providing a pathway to full IFMGA equivalency. The journey begins with gaining experience in climbing and skiing, often through mentorship from seasoned guides and instructors to build a strong foundation. From there, candidates can enroll in discipline-specific courses, such as the Rock Guide Course (RGC) or Ski Guide Course (SGC), and progress through the certification levels.
Unlike IFMGA, which requires comprehensive training across all disciplines, AMGA allows candidates to focus on their chosen specialty first. The modular framework involves around 86 days of targeted training and requires candidates to maintain current certifications in CPR and Wilderness First Responder (WFR). For those working in avalanche-prone areas, specialized avalanche training is mandatory. Guides who complete all three AMGA disciplines - Alpine, Rock, and Ski - earn the title of American Mountain Guide, a credential recognized by IFMGA and valid in over 20 member countries.
The key distinction between these two systems lies in their structure and approach to specialization. IFMGA certification demands comprehensive training across rock, alpine and ski disciplines, ensuring guides are well-rounded but requiring a significant commitment of time and resources. On the other hand, AMGA’s modular system allows candidates to specialize in one or more areas, enabling quicker entry into the profession while leaving the option open for broader certification later.
Time and cost considerations also differ. IFMGA certification typically takes about four years to complete and costs around $20,000. Meanwhile, AMGA’s modular approach allows for more flexibility, but when factoring in travel, accommodation, and additional certifications (like avalanche and medical training), the total investment approaches $50,000. However, AMGA candidates can tailor their pace to fit their schedules and financial situations, unlike the sequential nature of IFMGA training.
Another notable difference is in the training style. IFMGA combines structured group instruction with supervised fieldwork, offering a more linear and immersive experience. AMGA, in contrast, emphasizes gaining hands-on climbing and skiing experience, supplemented by formal courses and mentorship. As of October 2010, only about 70 guides had achieved IFMGA certification through AMGA, highlighting the rigorous nature of the IFMGA pathway.
Certification isn’t just about training - it plays a big role in legal recognition and daily operations. Whether a guide holds an IFMGA or AMGA certification can determine where they’re allowed to work and how their career unfolds.
IFMGA certification opens doors worldwide, with recognition in over 20 countries spanning Europe, North America, South America, Asia, and Oceania. In Europe particularly, it’s not just a credential - it’s a requirement. Without IFMGA certification, guiding technical mountain trips commercially in Europe is illegal.
AMGA certification, while highly respected, has its strongest foothold in the United States. Although the American Mountain Guide Certification is technically acknowledged internationally, most AMGA-certified guides focus their careers domestically, where their qualifications align perfectly with legal standards. These regional differences highlight the varied scopes of practice between the two certifications.
IFMGA-certified guides are trained across all three major mountain disciplines - rock climbing, alpine climbing, and skiing - making them versatile professionals capable of guiding diverse terrain worldwide. On the other hand, AMGA-certified guides often specialize in one discipline, such as rock, alpine, or ski guiding. This specialization aligns well with the U.S. market but can limit opportunities abroad. For example, an AMGA guide certified solely in rock guiding cannot legally or professionally lead ski mountaineering trips. The AMGA’s Scope of Practice (SOP) outlines these limitations, setting minimum standards for specific terrains.
Countries that recognize IFMGA certification enforce strict legal standards, ensuring that certified guides can work across borders without additional hurdles. Operating without IFMGA certification in these regions can lead to hefty fines and legal issues.
AMGA-certified guides, however, must navigate a patchwork of state, federal, and local regulations in the U.S. This includes obtaining permits for specific areas, adhering to land management agency rules, and carrying proper insurance. For those working in avalanche-prone areas, additional avalanche training is often required, though the specifics vary by jurisdiction.
Ultimately, IFMGA-certified guides enjoy greater international mobility, while AMGA-certified guides tend to focus on building their careers within the United States, where their certification aligns with local requirements and market demands.
Building on the details of training and recognition, let’s explore the pros and cons of each certification. Both certifications bring distinct strengths and challenges that shape a guide's career path and earning potential. By understanding these trade-offs, aspiring guides can make better-informed decisions for their professional growth.
IFMGA certification opens doors to guiding in key international markets without the need for additional licensing, creating broader career opportunities and the potential for higher earnings.
The training is incredibly thorough, covering rock climbing, alpine climbing, and skiing. This ensures IFMGA-certified guides are prepared for diverse terrain and challenging expeditions. As François, an experienced guide, put it:
"He is a highly trained high mountain guide, he will understand a mountain far better than the rest of us, even if he is not familiar with it. Anyone with those certifications is a true pro, the best of the best."
Additionally, IFMGA certification provides legal protection and credibility. In many Alpine countries, it’s a legal requirement for guiding operations, offering clients peace of mind while shielding guides from liability issues.
AMGA certification offers a more flexible path, allowing guides in the U.S. to specialize in areas like technical rock climbing, alpine routes, or ski mountaineering. This modular approach means guides can focus on their strengths and start earning income earlier, building expertise incrementally.
In the U.S., where most climbing venues and land management agencies don’t require formal certifications, AMGA credentials align well with domestic needs. This makes it an appealing option for those planning to work primarily within the country.
IFMGA certification requires a significant investment of both time and money. With a minimum of four years and over 90 days of formal training, costs can exceed $20,000. The comprehensive nature of the program also means guides must master all disciplines, even if their interest lies in just one.
AMGA certification, on the other hand, faces limitations in international recognition. While highly regarded in the U.S., it often falls short for legal guiding in other countries. For example, AMGA rock-certified guides are restricted to Grade IV or V routes with difficulty up to 5.10c, excluding glacier travel or extensive alpine routes. This means they wouldn’t qualify to lead a climb on Mont Blanc, which requires IFMGA certification.
Additionally, the lack of strict regulation in the U.S. can pose challenges. For instance, in the Eastern Sierra, only about 23% of listed guides are fully trained and certified in all aspects of mountain guiding they practice.
These limitations influence how guides align their certifications with career aspirations and the environments in which they plan to work.
| Attribute | IFMGA Certification | AMGA Certification |
|---|---|---|
| Global Recognition | Required for guiding in Europe; recognized internationally | Primarily recognized in the U.S. |
| Training Approach | Comprehensive across rock, alpine, and ski disciplines | Modular; allows specialization |
| Time Commitment | Minimum of 4 years with 90+ training days | Flexible; varies by specialization |
| Cost | Over $20,000 | Varies |
| Work During Training | Limited opportunities | Can guide while training |
| Legal Requirements | Mandatory in Alpine countries | Optional in most U.S. venues |
These distinctions provide a clearer understanding of the certification landscape and set the stage for exploring the specific expertise offered by SummitGuides.

The Alps are home to some of the most demanding and highly regulated mountain environments in the world. In this region, IFMGA certification is not just recommended - it’s a legal requirement for mountain guides. This mandate ensures that guides are equipped with the skills needed to handle the Alps' complex terrain, which includes legendary peaks like Mont Blanc, the Matterhorn, and Monte Rosa. Established by top Alpine guide associations, the certification covers everything from navigating glaciated landscapes to scaling technical rock faces and managing unpredictable weather. European authorities recognize IFMGA-certified guides as qualified to operate on any climbing or skiing terrain without restrictions. This rigorous standard guarantees that those leading expeditions in the Alps are thoroughly trained and prepared.
SummitGuides exemplifies these high standards through its work in the Alps. With over two decades of experience, our company, founded by IFMGA Mountain Guide Filippo Livorno, exclusively employs IFMGA-certified guides. This commitment to excellence ensures that every client benefits from the highest level of professional guiding.
The company’s approach reflects the extensive training required for IFMGA certification. SummitGuides' team is skilled in multiple disciplines, including avalanche safety and advanced route planning. Options range from relaxed ski tours in Gran Paradiso National Park to challenging ascents like the Matterhorn.
SummitGuides also prioritizes safety and preparation, aligning with the values of IFMGA certification. Filippo highlights the importance of this certification:
"Certification ensures that a guide has put themselves through the rigors of examination and mentorship of their peers and proven their ability to perform in accordance with professional best practices."
This rigorous process reassures clients that SummitGuides' team can handle everything from beginner-friendly ski tours to demanding multi-day treks like the Monte Rosa circuit, which starts at €3,150 for 6 days.
Another hallmark of SummitGuides' expertise is the adaptability of our Guides. Thanks to their extensive training, our professionals can confidently lead trips in unfamiliar locations by combining their broad knowledge of mountain environments with thorough pre-trip research. This adaptability shines across our Alpine programs, whether it’s guiding the classic Ski Haute Route from Chamonix to Zermatt (starting at €2,010 for 7 days) or leading an ascent of Mont Blanc (from €3,150 for 6 days).
Deciding between IFMGA and AMGA certifications comes down to your career aspirations and where you plan to work. AMGA certification is ideal for guides focusing on a single discipline - whether it's rock, alpine, or ski guiding - within the United States. On the other hand, IFMGA certification represents the highest level of mountain guiding credentials, requiring extensive training across all three disciplines. This path demands a significant investment of time and money but opens doors to a broader range of opportunities, especially in international settings.
For those aiming to guide in Europe, particularly in the Alps, IFMGA certification is often a legal necessity. The challenging Alpine environment - with its glaciers, technical rock climbs, and unpredictable weather - requires the well-rounded expertise that IFMGA-certified guides bring. With fewer than 200 IFMGA-certified guides in the United States, these professionals are part of an elite group qualified to guide on any terrain, be it climbing or skiing, without restrictions.
In short, AMGA certification provides specialized skills for specific environments, while IFMGA certification confirms a guide's all-encompassing expertise across various mountain terrains. Both certifications play a crucial role in shaping careers and ensuring safety, but aspiring guides should carefully consider their goals, budget, and the level of commitment required before choosing their path.
The IFMGA certification holds global recognition, making it an excellent choice for mountain guides aiming to work internationally. This certification often opens doors to more career opportunities, better earning potential, and a higher level of respect within the guiding community. Plus, it grants access to guide in some of the world’s most coveted destinations.
Meanwhile, the AMGA certification is highly regarded within the United States and offers a solid pathway for those focusing on domestic guiding. However, it may present limitations for guides who wish to work beyond U.S. borders. Ultimately, deciding between these certifications depends on your career aspirations and whether you plan to guide primarily in the U.S. or on a global scale.
IFMGA certification is a must for guiding in the Alps because it represents rigorous training across essential disciplines like mountaineering, ski touring, rock climbing, and ice climbing. This certification ensures guides maintain high standards of safety, professionalism, and expertise - qualities that are absolutely necessary in the demanding Alpine environment.
For guides holding AMGA certification, which is widely recognized in the United States and North America, opportunities in the Alps can be limited without also obtaining IFMGA certification. Since IFMGA serves as the legal benchmark for guiding in the region, AMGA-certified guides often need to pursue additional qualifications to meet these strict standards.


